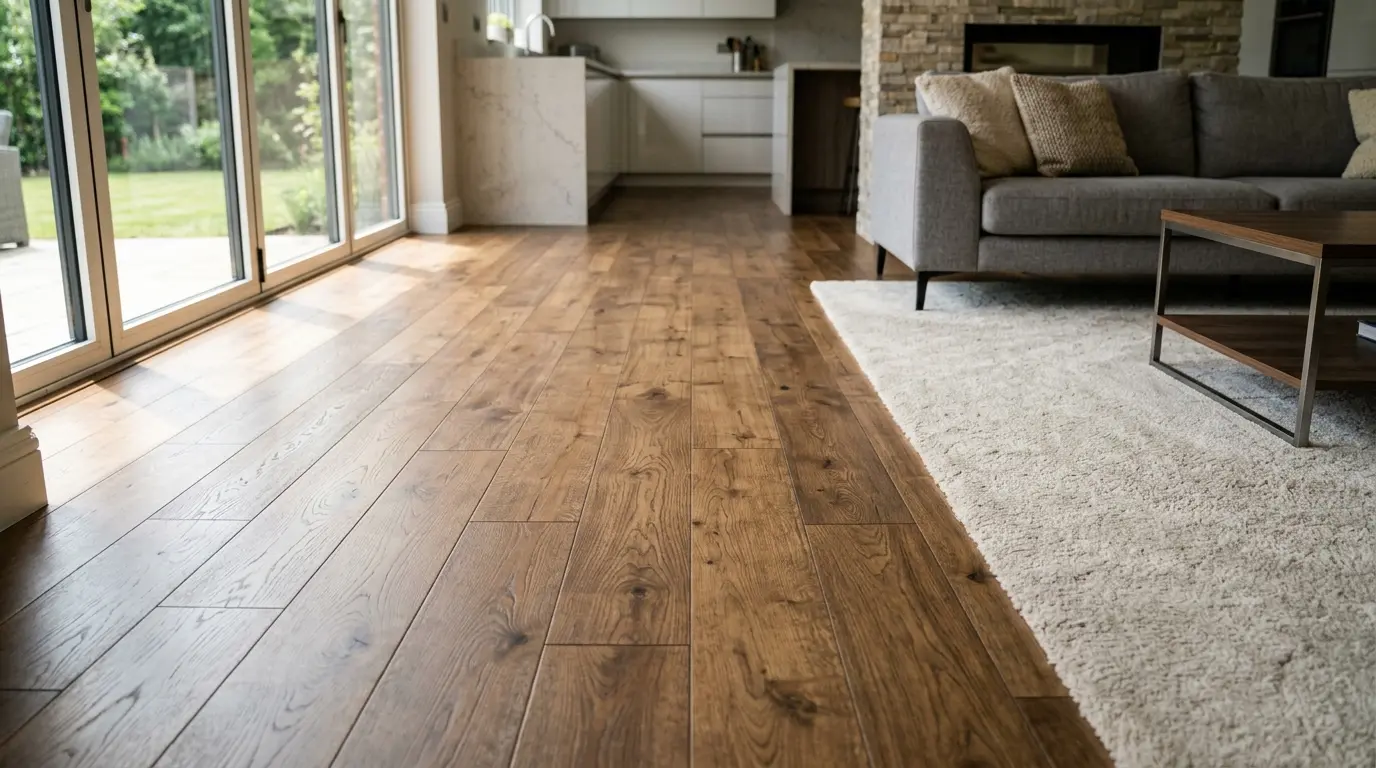

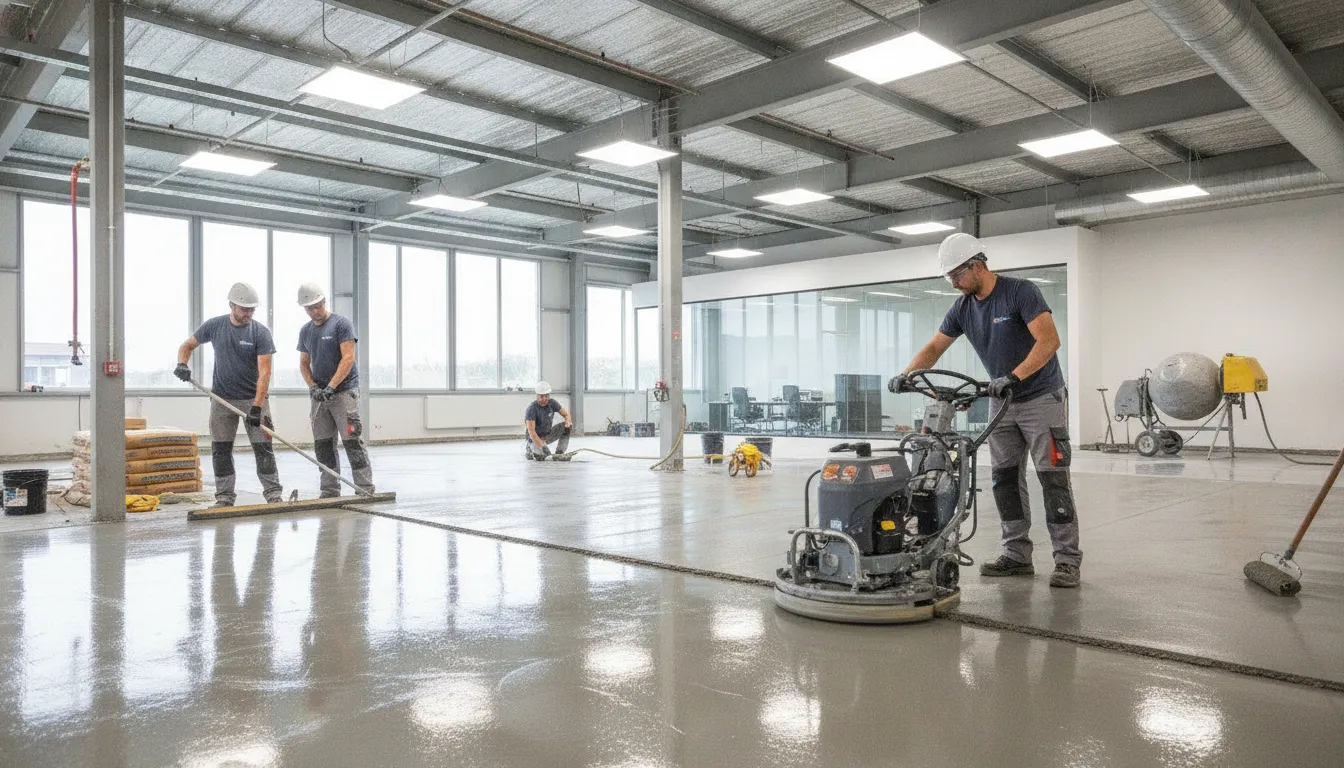
Concrete offers a strong foundation, but it will not correct poor preparation. During concrete floor installation, small oversights can create big problems, including surface dusting, random cracks, uneven transitions, moisture damage, and flooring that separates from the slab. Before work begins, evaluate the concrete’s strength, flatness, levelness, drainage, and moisture condition. Then match the finish to the property’s needs. A polished surface may suit a commercial space, while LVP or hardwood may provide more comfort in a home. This guide breaks down what to inspect, how to prepare, which materials to consider, and when to call a professional.
Key Takeaways
- Start with a thorough slab assessment: Check stability, moisture, flatness, cracks, drainage, and floor height before choosing a finish or scheduling installation.
- Select flooring based on the space: Compare concrete, LVP, hardwood, laminate, and glue-down options according to traffic, comfort, maintenance, moisture exposure, and safety needs.
- Work with an experienced flooring contractor: Choose a licensed and insured team that provides clear estimates, completes proper subfloor preparation, follows product requirements, and handles transitions, stairs, and trim with care.
Learn the Basics of Concrete Floor Installation
Concrete floor installation begins with an evaluation of the existing surface and the way the space will be used. A new slab, slab repair, polished concrete floor, and flooring installed over concrete each require a different preparation plan.
Before work starts, assess the slab’s strength, moisture, flatness, levelness, drainage, and finished height. These details affect the flooring materials you can use and the amount of preparation required. They also help prevent cracked flooring, uneven transitions, moisture damage, and delays.
The project may involve structural concrete work, surface repairs, or installation of a finished floor over an existing slab. A professional flooring contractor can help determine which option fits the property and whether another specialist should inspect the structure first. ValorCraft Flooring provides flooring installation and preparation services for residential, builder, property management, and commercial projects across North Carolina.
Choose a new slab, slab repair, or flooring over concrete
A new slab may be necessary when the existing concrete is severely cracked, unstable, poorly drained, or missing altogether. New concrete work may also be appropriate when the slab does not provide enough support for the planned floor system or when major settlement has changed the building’s elevations.
If the slab is structurally sound but has small cracks, holes, low areas, or surface damage, a professional may be able to repair and prepare it instead. High spots can typically be ground down, while compatible patching compounds can correct shallow depressions.
Flooring can often be installed over existing concrete when the slab is strong, clean, dry, and sufficiently flat. One manufacturer guide calls for concrete rated at least 3,000 psi and flatness within 1/8 inch over 6 feet or 3/16 inch over 10 feet. Review the flooring installation requirements for the selected product before preparation begins.
Decide between finished concrete and a concrete substrate
A finished concrete floor is intended to remain visible. It may be polished, stained, stamped, textured, or protected with a sealer. This approach can suit garages, workshops, retail spaces, warehouses, and other areas where durability and simple cleaning matter more than the softer feel of a floor covering.
A concrete substrate serves as the base for another material, such as luxury vinyl plank, hardwood, laminate, or glue-down flooring. In this case, the surface must meet the flooring manufacturer’s requirements for moisture, flatness, cleanliness, and strength. Even minor high spots or low areas can affect how finished flooring looks and performs.
Confirm that the concrete is compatible with the planned installation. Certain flooring systems may not be suitable over low-density concrete or gypsum-based products. The product instructions should also identify acceptable patching compounds, primers, adhesives, underlayments, and moisture limits.
Match the installation to the property and its use
The best concrete floor installation depends on how people use the space. A family room may benefit from a warmer, more comfortable floor covering, while a commercial corridor may need strong wear resistance, easy maintenance, and slip-resistant protection. Garages and workshops may require a finish that tolerates vehicle traffic, tools, oils, and repeated cleaning.
Consider foot traffic, furniture, equipment, pets, delivery routes, and neighboring rooms before selecting a material. In an occupied home, the installation plan should account for where residents will walk, cook, sleep, and store belongings during the project. Commercial work may require phased installation so the business can continue operating.
Coatings, stains, adhesives, and sealers may also require ventilation and personal protective equipment. Review concrete coating safety practices before scheduling work in an occupied home or active business.
Plan the budget, access, timeline, permits, and floor height
A useful estimate includes more than concrete or flooring materials. Account for demolition, surface preparation, crack repair, moisture testing, delivery, labor, equipment, disposal, curing, sealing, cleanup, trim, and transition work. Ask whether structural changes, drainage improvements, or a new slab require local permits or inspections.
Access can affect both cost and scheduling. The crew may need room for mixers, pumps, saws, flooring deliveries, and waste removal. Confirm where materials will be stored and how the team will protect nearby walls, cabinets, landscaping, and finished surfaces.
Plan for the time the space must remain closed during preparation, installation, curing, and final inspections. Check the finished floor height at doorways, stairs, cabinets, appliances, and adjoining rooms. Review professional flooring installation planning practices before work begins.
Determine when to schedule a structural assessment
Schedule a structural assessment when you notice significant settlement, wide or recurring cracks, uneven sections, water intrusion, sinking areas, or movement near walls and foundations. A structural review is also sensible when the slab’s age, thickness, reinforcement, drainage, or construction history is unknown.
A flooring contractor can identify many preparation concerns, but serious movement or foundation problems may require a qualified engineer or foundation professional. Resolve those issues before installing finished flooring. Covering an unstable slab can hide the problem and lead to damage in the new floor system.
Once the base is stable, the installation team can address flatness, moisture, curing, sealing, and surface protection. The final evaluation should confirm that the slab is suitable for its intended finish and use. Contact ValorCraft Flooring to discuss concrete preparation, flooring over concrete, and the right next step for your property.
Choose the Right Concrete Flooring Option
Concrete can serve as the finished floor or as a strong base for another flooring material. The right choice depends on how the space will be used, the condition of the slab, the amount of traffic, and the look you want to achieve. A polished or stained surface may suit a garage, basement, retail space, office, or modern home. In bedrooms, living areas, and many commercial settings, you may prefer luxury vinyl plank, hardwood, laminate, or glue-down flooring over the concrete.
Before choosing a finish, consider moisture exposure, comfort, maintenance, sound, floor height, and slip resistance. The slab should be clean, stable, and sufficiently flat for the selected installation method. Cracks, uneven areas, old coatings, and moisture concerns may require attention before any finish or floor covering is installed.
It is also helpful to consider how the floor will connect to adjoining rooms. Adding hardwood or LVP over concrete can raise the finished floor height and affect doors, baseboards, stairs, and transitions. ValorCraft Flooring helps homeowners, builders, property managers, and commercial clients compare materials and prepare concrete for professional installation through its flooring services.
Install polished concrete
Polished concrete creates a smooth, refined surface by grinding the slab with progressively finer abrasives. The process can produce a matte, satin, or high-gloss finish, depending on the desired appearance and the concrete’s condition. Since polished concrete has few seams, it can be relatively simple to clean and maintain.
This option works well in garages, retail spaces, offices, restaurants, and contemporary homes. It can handle heavy use, but polishing will not hide every flaw in the slab. Cracks, stains, patches, and color variation may remain visible. Some property owners appreciate that natural variation, while others prefer a more consistent appearance.
The slab must be strong enough to polish and free from incompatible coatings or contamination. Ask how repairs, aggregate exposure, color variation, and slip resistance will affect the finished result. Reviewing a detailed polished concrete installation guide can help you determine whether an existing slab is a suitable candidate.
Apply stained concrete
Concrete stain adds color while allowing some of the slab’s natural character to remain visible. Acid stains can create translucent, varied tones, while water-based stains offer a broader range of colors and may provide a more consistent appearance. The final result depends on the concrete mix, age, porosity, repairs, and any previous coatings.
Stained concrete can work in basements, patios, retail areas, and other spaces that need a decorative surface without separate planks or tiles. However, stain is not paint. It will not cover every patch or create a completely uniform color across an imperfect slab.
Test the product in a small, hidden area before treating the entire floor. The surface should be clean, dry, and properly prepared, and the stain should be protected with a compatible sealer. This concrete staining guide explains how product selection and application technique affect the finished appearance.
Create stamped or textured concrete
Stamped concrete uses patterns and textures to imitate materials such as stone, brick, slate, or tile. It is commonly used for patios, walkways, porches, and other exterior surfaces. Decorative textured finishes may also suit select commercial or interior applications when the design and maintenance needs are carefully considered.
The range of available patterns makes it easier to coordinate the floor with the surrounding property. Texture can add visual interest and may improve traction, but deeper patterns can collect dirt and require more detailed cleaning. A heavily textured surface may also be less comfortable for bare feet or harder to maintain with standard equipment.
Before choosing a pattern, discuss drainage, slope, control joints, furniture placement, and cleaning methods. The surface also needs a compatible sealer to protect it from moisture, stains, and wear. Research on stamped concrete applications can help you compare decorative finishes.
Seal concrete and apply protective finishes
Sealing helps protect concrete from moisture, stains, abrasion, and some chemical exposure. It can also change the floor’s appearance by adding a matte, satin, or glossy finish. The correct sealer depends on whether the floor is indoors or outdoors, how much traffic it receives, and whether the surface is polished, stained, stamped, or plain.
Before applying sealer, the concrete should be clean, dry, and free from dust, oil, curing residue, and incompatible coatings. Trapped moisture or surface contamination can cause cloudiness, peeling, bubbling, or uneven adhesion. A professional should also confirm that the product is suitable for the slab and the expected conditions.
Ask about drying time, ventilation, reapplication, chemical resistance, and slip resistance. A glossy finish may look attractive but become slippery when wet if the product is not selected or applied correctly. This concrete sealing guide offers useful information about matching protective finishes to the surface.
Install LVP, hardwood, laminate, or glue-down flooring over concrete
A concrete slab can support several finished flooring options when it is properly prepared. Luxury vinyl plank offers water resistance and a wide selection of wood-look designs. Laminate provides a durable decorative surface, while hardwood adds natural character when the product and site conditions allow. Glue-down flooring can be a practical choice for commercial spaces and rooms that need a stable, low-profile installation.
Preparation is essential for every option. The slab should meet the flooring manufacturer’s requirements for moisture, flatness, cleanliness, and strength. High spots may need grinding, while low areas may require a compatible patching or leveling compound. Moisture testing should take place before installing underlayment, adhesive, or flooring.
The finished floor height also matters. New flooring can affect doors, baseboards, stairs, appliances, and transitions to nearby rooms. ValorCraft Flooring installs LVP, hardwood, laminate, and glue-down flooring with attention to slab preparation, floor height, transitions, and trim work.
Compare durability, comfort, moisture, maintenance, and slip resistance
Durability should match the room’s traffic and the demands placed on the floor. Polished or sealed concrete can handle heavy use, but it may feel hard and cool underfoot. LVP and laminate provide a more comfortable surface for many living areas, while hardwood offers warmth and a natural appearance. Commercial spaces may need flooring that withstands rolling equipment, frequent cleaning, and concentrated foot traffic.
Moisture requires special attention in basements, utility rooms, and slab-on-grade spaces. A material may resist surface spills without being suitable for a slab with ongoing vapor problems. Ask for moisture testing before selecting flooring or adhesive.
Also compare sound transmission, repair options, cleaning requirements, and slip resistance when wet. A textured finish may provide more traction, but it can require additional cleaning. Reviewing these concrete safety factors can help you assess surface conditions before selecting a finish.
Plan cleaning, resealing, and ongoing care
Every concrete flooring option needs a care plan. Use cleaning products recommended for the finish, remove abrasive grit promptly, and avoid harsh chemicals that may damage a sealer or decorative treatment. Entry mats can reduce tracked-in dirt, while protective pads beneath furniture can limit scratches and pressure marks.
Sealed and decorative concrete may need periodic inspection and resealing. The schedule varies according to the product, traffic, sunlight, moisture exposure, and cleaning routine. Look for dull areas, peeling sealer, discoloration, or exposed concrete, and address these issues before damage spreads.
LVP, laminate, hardwood, and glue-down flooring have different cleaning and repair requirements. Ask the installer which products to use and which cleaning methods to avoid. Regular cleaning and resealing helps protect the surface and gives you a chance to identify small problems early.
Gather Concrete Floor Installation Tools and Materials
A concrete floor installation requires more than concrete and a trowel. The right materials depend on whether you are pouring a new slab, repairing an existing one, finishing concrete as the exposed surface, or preparing the slab for LVP, hardwood, laminate, or glue-down flooring. Each application has different requirements for strength, moisture control, flatness, adhesion, and protection.
Start with the project specifications, room dimensions, site access, expected traffic, and final flooring choice. A basement, garage, retail space, and living room may all need different preparation methods and products. Check floor height early, especially near doors, stairs, cabinets, drains, and adjoining rooms. The finished assembly may include concrete, patching compound, underlayment, adhesive, and flooring, all of which affect transitions.
If the project includes structural repairs, a new slab, drainage changes, or settlement concerns, consult a qualified concrete professional before ordering materials. For flooring installed over concrete, preparation is especially important. ValorCraft Flooring’s flooring installation services include subfloor preparation, LVP, hardwood, laminate, glue-down flooring, stairs, and trim work. A professional can help confirm whether the existing slab is ready for the selected flooring or requires repairs first.
Select concrete mix, water, aggregate, admixtures, and reinforcement
Choose the concrete mix according to the slab’s purpose, thickness, expected loads, exposure, and finishing method. A residential interior floor may have different requirements than a garage, warehouse, patio, or commercial space. The mix design should account for the desired strength, aggregate size, workability, and curing conditions.
Use clean water and follow the specified water-to-cement ratio. Adding excess water may make concrete easier to place, but it can weaken the finished slab and increase shrinkage. Admixtures may improve workability, set time, air content, or cold-weather performance, but they should be compatible with the project and used according to the manufacturer’s instructions.
Reinforcement may include welded wire, rebar, or synthetic fibers. It can help manage cracking and support the slab when the design calls for it, but it does not correct poor soil preparation or eliminate the need for control joints. For structural work, use a documented mix design and confirm requirements with the project engineer or concrete supplier. The American Concrete Institute offers technical guidance for concrete design and construction practices.
Prepare forms, vapor barriers, joint materials, and patching compounds
Forms hold fresh concrete in place and establish the slab’s edges, thickness, elevations, and transitions. Build them from straight, stable materials, then check that they are securely braced and set to the planned height. Any movement during the pour can create uneven edges or inconsistent slab thickness.
For interior slabs, a vapor barrier may help limit moisture movement from the ground into the concrete. Install it over a properly prepared base, seal laps and penetrations as specified, and avoid puncturing it during reinforcement placement. The correct system depends on site conditions, local requirements, and the final flooring material.
Plan isolation joints where the slab meets walls, columns, steps, or other fixed elements. Control joints should follow the planned layout and help manage where shrinkage cracking occurs. For existing slabs, keep compatible patching compounds available for cracks, holes, spalled areas, and low spots. Patch products must be suitable for the intended coating, adhesive, or floor covering. Always remove loose material and contaminants before applying repairs.
Use mixers, wheelbarrows, pumps, buckets, and handling equipment
Concrete handling equipment should match the pour size, access conditions, distance from the delivery point, and available labor. A small repair may require a portable mixer and buckets, while a larger slab may call for ready-mix delivery, wheelbarrows, a concrete pump, or a power buggy.
Plan the route before the pour begins. Remove obstacles, protect finished surfaces, and confirm that doors, gates, ramps, and floor openings can accommodate the equipment. Keep enough people available to place and level the concrete without long delays between loads. Fresh concrete can begin to set while the crew is still moving material, which may create cold joints or uneven sections.
Inspect mixers, pumps, cords, hoses, and wheelbarrows before use. Place equipment where it will not block emergency exits or create unnecessary trip hazards. For larger work, coordinate delivery timing, truck access, washout procedures, and cleanup in advance. The Portland Cement Association provides useful background on concrete materials, placement, and performance.
Gather screeds, floats, trowels, edgers, groovers, saws, and finishing tools
Prepare finishing tools before the concrete arrives. A straight screed helps strike off excess concrete, while a bull float or darby levels ridges and fills small surface voids at the correct stage. Hand floats, steel trowels, edgers, and groovers support detail work around walls, edges, openings, and joints.
For larger slabs, contractors may use vibrating screeds, power trowels, or other specialized equipment. Choose tools based on the slab size, finish specification, access, and crew experience. Using a tool too early or overworking the surface can draw water and fine material upward, which may weaken the top layer or create finishing problems.
Concrete saws are used to cut control joints after the slab has gained enough strength but before random cracking develops. Keep the intended joint layout marked and confirm cutting depth and timing for the mix and site conditions. Wear the required protective equipment when cutting, grinding, or operating powered tools. OSHA provides silica safety guidance for concrete cutting and surface preparation.
Use levels, straightedges, laser levels, and moisture-testing equipment
Accurate layout tools help the crew maintain the correct elevation, slope, thickness, and transitions. Use a laser level or builder’s level to establish reference points, then check the forms, reinforcement, thresholds, drains, and finished floor height against those marks.
Long straightedges and a suitable floor-flatness tool help identify high and low areas. This matters when the concrete will receive LVP, hardwood, laminate, or glue-down flooring. A slab can appear level while still having enough variation to cause gaps, rocking boards, adhesive problems, or visible imperfections in the finished floor.
Moisture testing should be part of the material plan, not an afterthought. Depending on the flooring system, testing may include concrete moisture content, relative humidity, pH, or vapor emission. Follow the flooring and adhesive manufacturers’ requirements, since acceptable readings vary by product. The Resilient Floor Covering Institute offers industry resources related to resilient flooring installation and substrate preparation.
Choose stains, sealers, curing compounds, underlayments, and compatible adhesives
The final finish determines which products belong on the slab. Stained or polished concrete may require densifiers, stains, guards, or sealers that are compatible with the desired appearance and traffic level. A garage, showroom, and home interior may need different protection against abrasion, chemicals, moisture, and slipping.
Curing compounds can help retain moisture during the early curing period, but some products may interfere with later coatings, adhesives, or flooring installation. Confirm compatibility before application. If the slab will receive floor coverings, select an underlayment, moisture-control system, patching compound, primer, and adhesive as one complete system.
For LVP, hardwood, laminate, or glue-down flooring, follow the product manufacturer’s requirements for substrate flatness, moisture, temperature, acclimation, and adhesive selection. Do not assume that one adhesive or primer works with every flooring product. A professional flooring installer can review the planned assembly and reduce the risk of adhesive failure, hollow spots, buckling, or visible floor movement. ValorCraft’s contact page is a useful starting point for discussing project conditions and material choices.
Prepare PPE, ventilation, dust control, and cleanup supplies
Concrete work exposes workers to wet cement, sharp materials, silica dust, noise, heavy loads, and powered equipment. Prepare gloves, eye protection, sturdy boots, long sleeves, hearing protection, knee protection, and respiratory protection when the task requires it. Wet concrete can irritate or burn skin, so keep clean water and a wash station available.
Grinding, cutting, and shot blasting require a dust-control plan. Use wet methods or properly connected vacuum systems where appropriate, and keep people away from active work areas. During staining, sealing, and adhesive application, provide ventilation according to the product’s safety data sheet. Keep ignition sources away from products that may be flammable.
Have plastic sheeting, drop cloths, brooms, vacuums, absorbent materials, waste containers, and concrete washout supplies ready before work begins. Protect walls, cabinets, finished flooring, doors, and nearby equipment from splashes and dust. A clean, organized site helps the crew work safely and makes it easier to inspect the slab before the next installation step.
Prepare for Concrete Floor Installation
A durable concrete floor installation starts with careful preparation. Before materials arrive, the slab should be clean, dry, stable, and suitable for the flooring system you plan to install. Skipping this work can lead to uneven flooring, adhesive failure, movement, moisture damage, or visible imperfections after installation.
Preparation looks different for a new slab, an older concrete floor, and flooring installed over an existing surface. The project may involve structural repairs, moisture control, surface profiling, leveling, or transition planning. Product requirements also vary between luxury vinyl plank, hardwood, laminate, and glue-down flooring.
If you are unsure whether the slab is ready, have a professional assess it before installation begins. ValorCraft Flooring provides subfloor preparation and flooring services for homeowners, builders, property managers, and commercial clients across North Carolina.
Clear the room and protect nearby surfaces
Remove furniture, rugs, appliances, wall décor, and personal belongings from the work area. If cabinets, built-ins, or equipment must remain, cover them with appropriate protective materials. Seal nearby openings when possible to limit dust from spreading into adjacent rooms.
Remove baseboards and trim carefully if they will be reused. Label each piece so it can return to the correct location. Sweep and scrape the exposed concrete to remove loose debris, nails, staples, metal fragments, and other protrusions that could interfere with installation.
Create a clear route for workers and materials before preparation begins. In an occupied home or commercial space, keep children, pets, visitors, and employees away from the work area. Protect finished surfaces and establish a safe place for tools, flooring materials, and waste.
Inspect the slab’s age, strength, thickness, flatness, levelness, and slope
Inspect the concrete before selecting a preparation method. A new slab may need additional time to cure and dry, while an older slab may show settlement, cracking, surface wear, or failed repairs. Check thickness and condition near walls, doorways, drains, and locations that will support heavy equipment or partitions.
Flatness and levelness are different. A floor may be generally level but still have ridges and dips that affect the finished flooring. Use a long straightedge or laser level to identify changes across the room. Compare the results with the flooring manufacturer’s tolerances.
Also check the slope, particularly near drains, garage doors, and commercial areas. Major settlement, severe cracking, weak concrete, or unexpected movement should receive further review before cosmetic preparation begins.
Test moisture, relative humidity, pH, and vapor transmission
Concrete may appear dry while still releasing moisture. Excess moisture can damage hardwood, weaken adhesives, cause flooring to separate, and create odor or mold concerns. Test the slab before installing LVP, hardwood, laminate, or glue-down flooring, using methods accepted by the product manufacturer.
A moisture evaluation may include in-situ relative humidity testing, calcium chloride vapor emission testing, and surface pH testing. The appropriate method and acceptable result depend on the flooring, adhesive, underlayment, and slab conditions.
For hardwood projects, review the National Wood Flooring Association’s guidance for wood flooring over concrete. If results exceed the product limits, do not cover the slab and hope it improves. Find the source of the moisture and use a compatible control system when the flooring manufacturer permits it.
Remove oil, paint, adhesive, dust, debris, and surface protrusions
Concrete must be free from contaminants that could prevent patching compounds, primers, or adhesives from bonding. Remove oil, grease, paint, old adhesive, drywall compound, loose concrete, and construction debris. Scraping may handle light residue, but bonded coatings and adhesive often require mechanical removal.
Sweeping alone does not remove fine dust from the slab’s pores. Vacuum the surface with equipment designed for construction dust, then inspect it under strong lighting. Run a hand across the concrete to find rough areas, ridges, or loose material that may not be obvious from a distance.
Use chemical cleaners only when they are approved for the flooring system. Cleaner residue can interfere with bonding just as much as the original contamination. After cleaning, allow the surface to dry fully and confirm that no film remains.
Grind, shot-blast, or mechanically profile the concrete as needed
Mechanical preparation removes weak surface material and creates a suitable profile for patching compounds, primers, moisture-control products, and adhesives. Grinding can remove high spots, paint, thin coatings, and surface laitance. Shot blasting works well for larger areas, while scarifying may be appropriate when deeper removal is necessary.
Choose the method based on the slab and the flooring system. Excessive grinding or scarifying can expose aggregate or damage the concrete. Insufficient preparation may leave contaminants or weak material behind.
Control dust during grinding and other mechanical work. Concrete dust may contain respirable crystalline silica, so use proper extraction equipment and follow OSHA’s silica safety requirements. Vacuum the slab thoroughly after profiling, then confirm that the surface meets the requirements for the next product.
Repair cracks, holes, settlement, weak concrete, and uneven areas
Repair visible damage before installing the finished floor. Hairline cracks may need a compatible crack treatment, while wider cracks, moving joints, settlement, and structural damage require closer assessment. Fill holes and damaged areas with repair products approved for concrete flooring.
Do not cover active leaks, unstable concrete, or areas that continue to move. A repair will not perform well if the cause remains below the surface. Check for settlement, poor drainage, plumbing leaks, moisture intrusion, or failed previous repairs.
Select repair materials according to the damage depth, location, drying time, and flooring system. Confirm that the material works with the planned adhesive, underlayment, or finish. Follow the product’s mixing and application instructions, and allow the repair to cure before applying additional materials.
Patch low spots and grind high spots to flooring tolerances
Use a long straightedge to find dips, ridges, and abrupt changes across the slab. Grind isolated high spots and remove dust before filling low areas with a compatible patching or self-leveling compound. Apply the material within the manufacturer’s recommended thickness and feather the edges into the surrounding concrete.
The objective is not always to make the entire room perfectly level. The objective is to create a flat surface that meets the flooring requirements. LVP can show dips and ridges through the planks, laminate may flex over uneven areas, and hardwood may move or squeak when the substrate is not prepared properly.
Let patching materials dry completely, then check the floor again. Scrape or grind minor ridges as needed without damaging the repaired areas. This step supports the flooring installation services offered by ValorCraft Flooring.
Plan forms, reinforcement, vapor control, edge isolation, and joints
If the project includes placing or replacing a slab, plan the concrete system before the pour. Confirm the form layout, reinforcement, vapor retarder, drainage, edge isolation, and control joints. These details affect slab movement, moisture behavior, strength, and finished floor height.
Place control joints where cracking can be managed instead of allowing random cracks to develop. Edge isolation separates the slab from walls and fixed elements. Reinforcement should be supported at the planned elevation, rather than resting on the ground. Vapor control should match both site conditions and the flooring that will cover the slab.
For flooring installed over an existing slab, forms and reinforcement may not apply. However, document cracks, joints, drains, moisture conditions, and transitions before work begins. This information helps the installation team plan compatible repairs.
Confirm drainage, slab thickness, floor height, and transitions
Check how water moves around and beneath the slab, especially in garages, basements, additions, and commercial spaces. Poor drainage can contribute to ongoing moisture and undermine repairs. Inspect exterior grading, downspouts, plumbing, and other possible sources of water intrusion.
Measure the slab and finished floor height at doors, stairs, cabinets, appliances, and adjoining rooms. Patching compound, adhesive, underlayment, and new flooring can all change the elevation. Even a small difference may affect door clearance, stair risers, baseboards, and appliances.
Plan transitions before installation. Identify where the new floor will meet tile, carpet, existing hardwood, or another material. Then select an appropriate reducer, threshold, or flush transition. Discuss site conditions and floor height with ValorCraft Flooring before scheduling the work.
Prepare the slab for LVP, hardwood, laminate, or glue-down flooring
Each flooring type has different preparation requirements. LVP generally needs a clean, dry, and flat surface, with underlayment used only when the product specifies it. Laminate also depends on flatness and moisture control, and its underlayment must be compatible with both the flooring and the slab.
Hardwood over concrete may require an approved moisture-control system, underlayment, or installation method. Glue-down flooring needs a properly profiled surface, compatible adhesive, and careful moisture and pH testing. The product instructions should guide the selection of primers, patching compounds, adhesives, and expansion requirements.
Before installation, confirm that the slab is clean, sound, dry enough for the selected product, and within the required flatness tolerance. Record moisture results and verify that all preparation materials have cured. Once the substrate meets these conditions, the flooring crew can begin installation on a sound foundation.
Follow the Concrete Floor Installation Process
Concrete floor installation involves much more than placing wet concrete and smoothing the surface. The crew must plan the finished elevation, prepare the base, install reinforcement and moisture controls, place the concrete consistently, and finish it at the right stage. Each step affects the slab’s strength, flatness, moisture performance, appearance, and compatibility with the flooring installed later.
The process also depends on the type of project. A new slab for a garage or commercial space may require forms, reinforcement, drainage, and control joints. An existing slab receiving luxury vinyl plank, hardwood, laminate, or glue-down flooring may instead need cleaning, moisture testing, grinding, patching, and leveling. These conditions should be assessed before materials are ordered or installation begins.
For flooring projects across North Carolina, ValorCraft Flooring coordinates preparation and installation around the selected material, the property’s use, and the condition of the concrete. Its flooring installation services include luxury vinyl plank, hardwood, laminate, glue-down flooring, stairs, trim work, and subfloor preparation for residential and commercial spaces.
Measure the space and set elevations, thickness, slope, and joint layout
Begin by measuring the entire work area, including closets, alcoves, doorways, openings, transitions, and spaces around fixed objects. Accurate measurements help determine the required concrete volume and identify changes in floor height that may affect doors, cabinets, stairs, appliances, and neighboring rooms.
Set the finished elevation before placement begins. The plan should account for the slab, insulation, underlayment, adhesive, and final flooring material. Mark any slope required for drainage, particularly in garages, utility rooms, commercial areas, and spaces exposed to water.
Plan control joints around the shape and size of the slab, walls, columns, openings, drains, and other stress points. Establishing the layout early helps the crew maintain a consistent elevation and gives later flooring work a clear reference. It also reduces the risk of awkward joints, uneven transitions, or unexpected height differences between rooms.
Confirm delivery access, weather, permits, crew order, and cleanup
Concrete delivery requires careful site coordination. Confirm that trucks, pumps, wheelbarrows, and other equipment can reach the placement area without damaging driveways, landscaping, curbs, walls, or finished surfaces. When access is limited, establish the material-handling route before the concrete arrives.
Check local permit requirements and confirm that required inspections are complete. Weather also affects placement and curing. Rain, freezing temperatures, strong wind, and direct sun may require coverings, shade, windbreaks, or curing blankets. A professional crew should review the forecast and have a plan for changing conditions.
Set the work sequence in advance. Confirm who will prepare the site, place and finish the concrete, remove forms, clean the area, and complete subsequent flooring work. Clear scheduling limits delays and keeps unfinished concrete away from active household or business areas. This concrete installation guidance covers several access and site-planning considerations.
Set forms and verify reinforcement, vapor barriers, drainage, and edge isolation
Forms establish the slab’s boundaries and finished elevation. They should be straight, secure, properly supported, and checked at corners, openings, transitions, and edges. Even minor movement during placement can change the slab height or create uneven surfaces.
Verify the specified reinforcement, such as rebar, welded wire mesh, or fiber reinforcement. Rebar and mesh must remain in the correct position within the slab rather than resting on the base. Depending on the site, the assembly may also require a vapor barrier beneath the slab to reduce moisture movement from the soil.
Confirm that drainage directs water away from the slab and surrounding structure. Edge isolation material can separate the slab from walls, columns, and other fixed elements, allowing controlled movement as the concrete dries and responds to temperature changes. Review the complete assembly with the project professional and follow applicable concrete floor preparation guidance.
Mix concrete at the specified water-to-cement ratio
Concrete strength and durability depend partly on its mix design and water-to-cement ratio. Use the amount of water specified for the selected mix, intended application, weather, and placement method. Adding extra water may make the material easier to spread, but it can reduce strength and increase shrinkage, dusting, cracking, or surface problems.
Follow the supplier’s instructions for cement, aggregate, admixtures, mixing time, and placement temperature. If the concrete arrives ready-mixed, do not add water without approval from the responsible concrete professional. Any approved adjustment should be recorded for the project file.
The finished mix should be workable enough to place and consolidate properly without becoming overly wet. Keep workers protected during mixing and handling, particularly around rotating equipment, wet concrete, and heavy materials. These concrete safety practices provide useful reminders for safe material handling.
Pour concrete in manageable sections at a consistent thickness
Place the concrete in a sequence that matches the form layout and the crew’s finishing capacity. Manageable sections allow the team to spread, consolidate, screed, and finish the surface before the material begins to set. The placement pattern should limit cold joints and avoid isolated areas that become difficult to blend.
Maintain the planned slab thickness throughout the work area. Depth checks, grade pins, or other elevation references can help identify thin spots while the concrete is still workable. Consistent thickness supports more predictable strength, drying, and long-term performance.
Keep delivery and placement moving at a steady pace when possible. Delays between loads, sudden weather changes, or limited access can make it harder to create a uniform slab. Protect nearby walls, cabinets, landscaping, and finished surfaces from splashes and tracked concrete as the crew works.
Distribute and consolidate wet concrete without segregation
Spread the wet concrete evenly through the forms using a controlled work pattern. Avoid dropping it from excessive heights or moving it over long distances, since rough handling can separate the cement paste from the aggregate. Segregated concrete may produce inconsistent strength and an uneven surface.
Consolidation removes trapped air and helps the concrete contact the reinforcement, forms, corners, and edges. Depending on the project, the crew may use a vibrator, hand tools, or another approved method. The objective is a dense, uniform slab without voids or displaced reinforcement.
Over-vibration can also create problems by allowing aggregate to settle and paste to rise. Use enough consolidation for complete coverage, then move to screeding while the concrete remains workable. The recommended concrete placement process includes distribution and consolidation as important steps.
Screed and level the concrete to the planned elevation
Screeding removes excess concrete and brings the surface to the planned elevation. The crew pulls a straightedge across forms or guide points in a steady motion, filling low areas and removing high areas as needed.
Work carefully around reinforcement, drains, posts, doorways, and edges so the surface does not dip or rise unexpectedly. Multiple checks are better than relying on a single pass. The screed should also reflect the required slope, particularly where water must move toward a drain or exterior opening.
A properly screeded floor creates the foundation for later finishing and flooring installation. Rooms receiving hardwood or glue-down flooring typically require a controlled, even substrate, while a garage may require a deliberate slope for drainage. Poor screeding can lead to additional grinding, patching, or leveling before floor coverings can be installed.
Check coverage, slope, flatness, and surface contact
After screeding, inspect the slab for full coverage around reinforcement, forms, drains, corners, and penetrations. Look for voids, low areas, exposed reinforcement, or locations where concrete has not made proper contact with the base.
Verify the planned slope with a level, laser, straightedge, or other suitable measuring tool. Confirm that water will flow where intended and that transitions to adjacent rooms remain practical. The finished elevation should not interfere with doors, thresholds, stairs, cabinets, or appliances.
Flatness also matters when concrete will receive flooring. Check the surface with a straightedge and compare variations with the tolerance required by the selected product. Suitable subfloor preparation services can address compatible concrete surfaces before new flooring is installed.
Float, edge, and groove the slab at the right stage
Floating begins after screeding and helps close larger surface irregularities while bringing a small amount of paste toward the surface. Timing matters. If the concrete is too wet, floating may draw excess water and cement paste upward. If it has set too much, the tool can tear or damage the surface.
Edging shapes the perimeter and creates a clean transition beside forms or isolation material. Grooving creates planned weakened sections where shrinkage cracks can develop in controlled locations. The crew should follow the joint layout established during planning.
Concrete changes quickly according to temperature, wind, sun, mix design, and slab thickness, so the correct timing may vary across the same project. The crew should work in an organized sequence and avoid forcing tools into concrete that is not ready for the next step.
Let bleed water evaporate before final finishing
Bleed water is moisture that rises to the surface as heavier concrete materials settle. Do not begin final finishing while visible water remains on the slab. Working that moisture into the surface can create a weak, dusty, or flaky finish.
Allow the water to evaporate naturally while protecting the area from rain, debris, and unnecessary foot traffic. The waiting period depends on the mix, temperature, humidity, wind, sun, and slab conditions. Do not spread dry cement over the surface to absorb water unless the project specifications specifically permit it.
While waiting, the crew can check tools, forms, access paths, and safety conditions. Once the surface loses its wet sheen and reaches the appropriate firmness, final finishing can continue without trapping excess moisture near the top of the slab.
Trowel the surface without overworking it
Troweling refines the surface and helps create the texture required for the intended finish. Use the correct tool and pressure for the concrete’s stage of set. The goal is an even, suitable surface, not repeated passes that force excessive paste toward the top.
Overworking can close the surface too early, trap moisture, or create a weak layer that later dusts, flakes, or delaminates. Excessive pressure may also leave ridges, burn marks, or uneven texture. The number and timing of passes should reflect the desired finish and the flooring that will be installed.
A substrate for LVP, hardwood, laminate, or glue-down flooring does not always need the same finish as decorative polished concrete. Confirm the surface requirements with the flooring and adhesive manufacturers before work begins. This coordination can reduce grinding, patching, and compatibility problems later.
Cut control joints at the right time
Control joints help guide shrinkage cracks to planned locations. Cuts should be deep enough and positioned according to the approved layout, with spacing suited to the slab’s dimensions, geometry, reinforcement, and exposure.
Timing is essential. Cutting too early can pull aggregate from the surface or damage the joint edges. Cutting too late may allow uncontrolled cracks to form. The correct window depends on the mix, temperature, humidity, equipment, and curing conditions.
Keep joint lines straight and consistent, especially where they meet walls, columns, drains, openings, or other joints. Document the layout so future flooring work can account for it. Before installing floor coverings, joints may require compatible filling or treatment to create a smooth, stable surface.
Polish, stain, stamp, or seal the finished concrete
After the concrete reaches the required curing condition, choose a finish based on appearance, use, maintenance, and moisture exposure. Polishing can create a smooth, durable surface. Staining adds color variation, while stamping can reproduce the look of stone, brick, or other textures.
Sealers can help protect against staining, abrasion, and moisture, but the product must match the concrete condition and intended use. Some sealers are designed for interior floors, while others suit exterior or high-traffic environments. Follow the manufacturer’s instructions for surface preparation, application, ventilation, drying, and recoating.
Plan decorative finishes before placement whenever possible. Color, texture, joints, edges, and sample approval can affect the work sequence. Allow the finish to dry and cure before placing furniture, applying adhesives, or reopening the area. Compare decorative concrete with other residential and commercial flooring options before selecting the final surface.
Confirm moisture and flatness before installing floor coverings
A slab can appear dry while still holding enough moisture to affect flooring adhesives, underlayments, planks, boards, and sealers. Test moisture according to the requirements of the flooring and adhesive manufacturers. Depending on the project, testing may include relative humidity, moisture vapor emission, or calcium chloride methods.
Check flatness with a straightedge and correct high or low areas before installation. Grinding can remove small high spots, while a compatible patching or leveling compound may correct low areas. The repair material must bond to the concrete and remain suitable for the selected flooring.
Do not install floor coverings until the substrate meets the required moisture, flatness, cleanliness, and strength conditions. Proper preparation helps prevent loose planks, hollow spots, adhesive failure, cupping, gaps, and premature wear. It is particularly important when installing flooring over an existing slab.
Install LVP, hardwood, laminate, glue-down flooring, stairs, or trim
After the concrete passes its moisture and flatness checks, install the selected flooring according to the product requirements. Luxury vinyl plank may require an approved underlayment or direct installation over a prepared slab. Hardwood and laminate have specific moisture limits, acclimation instructions, expansion clearances, and installation methods.
Glue-down flooring requires a clean, smooth surface that matches the adhesive specifications. Confirm compatibility between the adhesive, concrete sealer, patching compound, vapor-control system, and flooring material before application. If the slab has been polished or sealed, additional preparation may be necessary.
Finish the project with properly fitted stairs, baseboards, casing, transitions, and trim. These details should account for the final floor height and required movement clearances. ValorCraft Flooring explains its focus on licensed, insured, carpenter-run work completed by professional in-house crews on its About Us page.
Understand How Long Concrete Takes to Cure
Concrete does not become ready for its final use as soon as it feels hard. It needs time to gain strength, release excess moisture, and stabilize before a sealer, adhesive, or flooring material is applied. The timeline depends on the concrete mix, slab thickness, weather, ventilation, sunlight, curing method, and the product selected for the finished floor.
A slab may support careful foot traffic after a short period while still holding too much moisture for luxury vinyl plank, hardwood, laminate, or glue-down flooring. Installing flooring too soon can lead to adhesive failure, cupping, buckling, discoloration, mold growth, or other problems. That is why moisture testing and surface evaluation should be part of the installation plan.
For homeowners, builders, property managers, and commercial clients, curing time should also be coordinated with other work. Furniture removal, deliveries, trim installation, painting, inspections, and access restrictions can all affect the schedule. ValorCraft Flooring evaluates the concrete substrate before proceeding with professional flooring installation services, helping ensure the floor is prepared for the material selected.
Distinguish setting, curing, drying, and moisture readiness
Setting is the early stage when wet concrete begins to stiffen and lose its workable consistency. Curing is the process of maintaining suitable moisture and temperature so the cement can continue developing strength. Drying is different from both. It describes moisture leaving the slab through evaporation or an active drying process.
A concrete floor can be firm enough to walk on while remaining too damp for a sealer, adhesive, hardwood, laminate, or luxury vinyl plank. Moisture readiness depends on the flooring and installation products being used, along with each manufacturer’s requirements. Before work begins, confirm whether the slab needs more drying time, surface preparation, a moisture-control system, or a compatible underlayment.
Track the first hours, first seven days, and 28-day strength benchmark
The first hours after placement are critical because fresh concrete is vulnerable to foot traffic, rapid moisture loss, temperature changes, and surface damage. During this period, the crew protects the slab, completes finishing work at the proper stage, and creates control joints when the concrete is ready.
Concrete often develops a substantial portion of its early strength during the first seven days. The 28-day mark is commonly used as a reference for design strength, but it does not automatically mean the slab is ready for flooring. Strength development and moisture reduction follow separate timelines. The American Concrete Institute’s curing guidance explains how curing conditions affect concrete performance.
Account for temperature, humidity, wind, sun, thickness, and mix design
Temperature affects how quickly concrete sets and gains strength. Cold conditions can slow the process, while heat, low humidity, wind, and direct sunlight can remove surface moisture too quickly. Uneven or rapid drying can contribute to shrinkage cracks, dusting, surface weakness, or other finish problems.
Thicker slabs generally take longer to dry because moisture has farther to travel before leaving the concrete. Mix design also matters. Water content, cement type, aggregate, admixtures, and vapor-control materials can all affect the schedule. A reliable estimate considers these factors together rather than assigning the same cure time to every project.
Plan for North Carolina weather and job-site conditions
North Carolina projects may encounter hot summers, high humidity, sudden rain, winter freezes, and quick weather changes. Conditions can vary across the Triad and other parts of the state. High humidity may slow drying, while direct sun and moving air can dry the exposed surface faster than the concrete below it.
Review the forecast before pouring, finishing, or opening the area to other trades. Protect open forms from rain, control interior airflow, and prevent fresh concrete from freezing. On occupied residential or commercial sites, coordinate furniture removal, deliveries, inspections, and access restrictions so the slab is not disturbed while it is still vulnerable.
Use wet curing, plastic coverings, curing blankets, or curing compounds
Curing methods help concrete retain moisture while it develops strength. Depending on the project, a crew may use wet burlap, controlled water application, plastic sheeting, curing blankets, or a curing compound. The selected method should match the weather, slab finish, concrete mix, and intended flooring system.
Some curing compounds can interfere with sealers, coatings, or flooring adhesives. They may need to be removed before installation, while certain coverings can trap unwanted moisture if used incorrectly. Discuss the curing plan before the pour, especially when the finished surface will receive a decorative coating or glue-down flooring. The Portland Cement Association’s curing guidance explains how these methods support concrete performance.
Follow minimum no-traffic periods for people, pets, furniture, and vehicles
Fresh concrete should remain free from traffic until it has developed enough surface strength for the intended use. Foot traffic may be restricted for at least 24 hours, but the actual period depends on the mix, temperature, finish, and project requirements. Furniture, rolling loads, pallet jacks, and vehicles require more time and appropriate protection.
Keep children, pets, visitors, and other trades away from the area. A footprint or wheel mark can damage the finish, while early loading can create dents, cracks, or weak areas that become visible after flooring is installed. Use barriers and signs, then follow the contractor’s access instructions instead of relying on the surface appearance.
Test moisture before applying sealers, adhesives, LVP, hardwood, or laminate
Moisture testing should take place before installing a moisture-sensitive finish. Depending on the project, testing may include in-slab relative humidity probes, calcium chloride testing, surface pH checks, or moisture meter readings. Relative humidity testing can provide useful information about conditions within the slab, rather than only at its surface.
Every flooring and adhesive manufacturer sets its own acceptable limits. Hardwood may require stricter moisture conditions than some other materials, while glue-down products can fail when vapor pressure moves moisture through the slab. The National Wood Flooring Association’s technical publications offer guidance for evaluating concrete substrates before wood flooring installation. Keep test results with the project records.
Protect the slab from premature drying, freezing, impact, and contamination
During curing and drying, protect the slab from conditions that can affect its strength or finish. Prevent rapid moisture loss caused by strong airflow, direct sun, or high heat. Protect fresh concrete from freezing temperatures, standing water, dropped materials, tire traffic, and construction debris.
Oil, drywall compound, paint, curing residue, and other contaminants can interfere with sealers and adhesives. If contamination occurs, the surface may need mechanical cleaning or profiling before flooring work begins. Use protective coverings carefully so they do not trap unwanted moisture against the slab, and confirm that the covering is suitable for the concrete’s curing stage.
Reopen the space gradually and verify slip resistance
After the slab meets the required strength and moisture conditions, reopen the area in stages. Start with light foot traffic, then introduce furniture and equipment according to the contractor’s instructions. Place clean protective pads beneath furniture legs, and avoid dragging heavy items across concrete or newly installed flooring.
Finished concrete also needs a safety check. Sealers, stains, polish, and cleaning residue can affect traction, particularly near entrances, kitchens, bathrooms, and other areas exposed to water. Verify slip resistance before regular use, and apply a compatible anti-slip treatment when appropriate. Before returning the space to normal use, inspect transitions, trim, stair edges, and floor protection.
Follow Concrete Floor Installation Safety Practices
Concrete floor installation involves wet cement, heavy materials, power tools, airborne dust, chemical products, and changing job-site conditions. A safe process protects the crew, homeowners, pets, visitors, and the finished floor. Before work begins, identify potential hazards, assign responsibilities, and keep people who are not involved in the project away from the work area.
Safety also matters after the concrete is placed. Grinding, staining, sealing, adhesive application, flooring installation, and cleanup each create different risks. Professional crews should follow product instructions, use task-specific protective equipment, and allow enough time for the slab, coatings, and adhesives to cure before reopening the space.
Protect skin and eyes from wet concrete burns
Wet concrete is highly alkaline and can irritate the skin or cause chemical burns. Contact may not feel serious right away, so do not rely on discomfort as a warning. Anyone handling concrete should cover exposed skin and avoid kneeling directly in fresh material.
If wet concrete touches the skin, remove contaminated clothing and rinse the area with clean water immediately. Avoid aggressive scrubbing, which can work cement particles deeper into the skin. Flush the eyes with clean water for at least 15 minutes and seek medical care if irritation continues. The National Institute for Occupational Safety and Health provides concrete exposure guidance for workers and employers.
Wear gloves, eye protection, protective clothing, boots, and hearing protection
Personal protective equipment should match the task. Wear alkali-resistant gloves when handling wet concrete, safety glasses or a face shield during mixing and pouring, and clothing that covers the arms and legs. Waterproof boots with slip-resistant soles help protect feet from wet concrete while reducing the risk of slipping.
Grinding, cutting, and demolition may require a fitted respirator, hearing protection, and additional face protection. Inspect PPE before each shift and replace items that are torn, cracked, contaminated, or poorly fitted. Protective equipment does not replace safe work practices, but it provides an important layer of protection when exposure cannot be fully avoided.
Control silica dust during grinding, cutting, and surface preparation
Grinding and cutting concrete can release respirable crystalline silica, a fine dust that can cause serious lung disease when inhaled. Use wet-cutting methods or tools connected to a properly rated dust-collection system whenever possible. Do not dry sweep or use compressed air, since both methods can send settled particles back into the air.
Keep other people away from active grinding areas, and clean nearby surfaces with a HEPA vacuum or wet method. Workers should follow equipment instructions and applicable exposure controls for the project. OSHA’s silica control guidance offers practical information for concrete and masonry work.
Operate mixers, pumps, saws, grinders, and electrical equipment safely
Inspect tools and equipment before use. Check guards, blades, cords, plugs, hoses, switches, and emergency shutoffs. Never remove a guard to speed up a task, and do not use equipment with damaged cords, exposed wiring, or leaking hydraulic lines. Only trained workers should operate mixers, pumps, saws, grinders, and other powered equipment.
Keep hands, loose clothing, and tools away from moving parts. Disconnect equipment before clearing a jam, changing a blade, or performing maintenance. Electrical tools used near water should have appropriate ground-fault protection. Route cords away from wet areas, walkways, sharp edges, and moving equipment.
Ventilate during staining, sealing, and adhesive application
Stains, sealers, primers, and flooring adhesives may release vapors that irritate the eyes, skin, or respiratory system. Read the product label before application and confirm that the material suits the room, substrate, temperature, and flooring system. Open doors and windows when practical, and use fans to move air without blowing dust onto wet finishes.
Do not place fans where they could push solvent vapors toward an ignition source or occupied area. Keep flames, sparks, and smoking materials away from flammable products. When installing flooring over concrete, select compatible adhesives and underlayments, then follow the manufacturer’s ventilation and reentry instructions.
Follow safety data sheets and keep wash stations available
Every chemical product used on the job should have an accessible safety data sheet, commonly called an SDS. It explains hazards, required PPE, first-aid steps, storage requirements, spill response, and disposal instructions. Review the SDS before using stains, sealers, curing compounds, cleaners, primers, or adhesives.
Keep clean water, an eyewash bottle or station, soap, paper towels, and a stocked first-aid kit close to the work area. Workers should know how to report an exposure and where to get help. Store chemicals in labeled containers, never unmarked bottles, and keep them away from heat, food, children, and pets. OSHA’s Hazard Communication Standard provides additional guidance on chemical information and worker training.
Lift concrete bags, tools, and flooring materials correctly
Concrete bags, buckets, flooring cartons, tools, and equipment can be heavy and awkward to carry. Before lifting, check the load, clear the path, and decide where it will go. Stand close to the item, keep your feet stable, bend at the knees, and lift with your legs while keeping the load near your body.
Ask for help with heavy or oversized materials. Use carts, dollies, pallet jacks, or mechanical lifting equipment whenever possible. Avoid twisting while carrying, and set materials down before changing direction. Plan delivery and staging areas so materials do not block exits, stairs, electrical panels, or walkways.
Control wet surfaces, cords, debris, equipment, and trip hazards
Concrete, water, adhesive, cords, tools, and scrap materials can quickly create slip and trip hazards. Keep walkways clear and establish designated areas for tools, bags, waste, and equipment. Route cords and hoses away from paths, secure them when necessary, and use ramps or cord covers where foot traffic cannot be avoided.
Clean spills promptly, but never walk across wet concrete or freshly applied finishes to reach them. Mark changes in elevation, open edges, floor penetrations, and areas with limited access. At the end of each work period, remove debris and confirm that doors, stairs, and emergency exits remain usable. An organized site helps protect people and reduces the risk of damaging the new floor.
Restrict homeowner, pet, and visitor access during pouring and curing
Fresh concrete, wet sealers, adhesives, tools, and exposed equipment should not be treated as safe for casual foot traffic. Use barriers, warning signs, locked doors, or temporary fencing to separate the work zone from the rest of the property. Tell homeowners and other occupants which entrances and rooms are closed.
Pets need special attention because they may walk through wet products, lick contaminated paws, or disturb curing surfaces. Keep them away until the floor is fully ready for use. The same rule applies to children, delivery personnel, visitors, and workers who are not part of the installation crew. Maintain restricted access during pouring, finishing, curing, sealing, and flooring installation.
Verify slip resistance before reopening the space
A finished concrete floor should provide suitable traction for its location and intended use. Smooth, wet, dusty, or improperly sealed surfaces may become slippery, especially near entrances, bathrooms, kitchens, garages, and commercial areas. Consider moisture levels, foot traffic, cleaning methods, and accessibility needs when selecting the finish.
Before reopening the area, remove residue, confirm that the sealer or coating has cured according to the product instructions, and inspect the surface under normal lighting. Add a compatible anti-slip additive or treatment when appropriate. For commercial or high-traffic spaces, ask a qualified flooring professional to review the finish and confirm that it meets project requirements. A professional flooring installation team can also help coordinate surface preparation, transitions, trim, and access controls before regular use resumes.
Avoid Common Concrete Floor Installation Mistakes
Concrete flooring may look straightforward once the surface is complete, but reliable results depend on preparation, timing, and careful inspections. Small oversights, such as leaving debris on the slab or adding too much water to the mix, can lead to cracks, weak areas, moisture damage, uneven flooring, or adhesive failure.
The installation process does not end when concrete is poured. The slab must be evaluated, prepared, finished, cured, tested, and protected before it is ready for flooring. This is especially important when installing LVP, hardwood, laminate, or glue-down flooring over concrete because those materials depend on a stable, dry, and sufficiently flat substrate.
Before work begins, identify who is responsible for structural repairs, moisture testing, floor preparation, flooring installation, and final inspection. A clear plan helps prevent one trade from covering a problem that should have been corrected earlier. The following checks can help homeowners, builders, property managers, and commercial clients avoid common issues.
Complete a site evaluation, slab inspection, and moisture test
Start with a complete review of the installation area. Inspect the slab’s age, thickness, strength, flatness, levelness, slope, cracks, previous repairs, and connection to surrounding surfaces. Look for settlement, movement, water intrusion, weak concrete, and other conditions that may require a structural assessment before flooring work begins.
Clean the concrete before testing or preparation. Remove soil, mud, construction debris, nails, metal, paint, oil, adhesive residue, and anything else attached to the surface. Manufacturer installation guidance also recommends removing protrusions and debris before installation.
Moisture testing is equally important. Depending on the flooring system, testing may include moisture content, relative humidity, pH, and vapor transmission. Do not judge readiness by appearance alone. Concrete can look dry while still containing enough moisture to damage hardwood, loosen adhesive, or affect a finish.
Avoid pouring over contaminated, damp, weak, or unstable concrete
Never place new concrete or flooring over a contaminated or unstable base. Oil, dust, paint, curing residue, and old adhesive can interfere with bonding. Weak or deteriorated concrete may continue breaking apart beneath the new layer, creating voids, movement, and uneven support.
Correct the underlying problem first. Repair cracks and holes, remove unsound material, and address settlement or drainage concerns. If the slab is damp, identify whether moisture comes from poor grading, plumbing, groundwater, or vapor transmission through the floor.
New slabs also need proper support and curing time. One flooring warranty guide states that a new concrete slab should cure for at least 60 days and include a 10-mil polyethylene sheet between the ground and concrete. Always confirm the requirements for the selected concrete and flooring products before scheduling installation.
Use the right mix and curing products without adding excess water
Select a concrete mix based on the project’s thickness, strength, exposure, finish, and intended use. The water-to-cement ratio, aggregate, cement type, and admixtures affect workability, strength, shrinkage, and drying time. Extra water may make concrete easier to spread, but it can reduce strength and increase surface problems.
Follow the specified mix design instead of adjusting it by eye. Use only approved admixtures, curing compounds, sealers, and patching products. Some curing compounds can interfere with stains, sealers, adhesives, or floor coverings, so product compatibility should be confirmed before application.
The Michigan Concrete Association’s curing guidance explains that mix design, water-to-cement ratio, and admixtures can significantly affect curing time. Keep the project requirements on site and make sure everyone handling the concrete understands the approved proportions.
Account for temperature, humidity, wind, sun, drainage, and access
Weather and site conditions can change the installation schedule. High temperatures, wind, and direct sunlight can pull moisture from the surface too quickly, while cold conditions can slow setting and curing. Humidity also affects how quickly moisture leaves the slab and when coatings or flooring can be installed.
Plan the pour around the site, not just the calendar. Confirm that delivery trucks, mixers, pumps, wheelbarrows, and workers can reach the area without crossing finished surfaces. Check drainage paths so rainwater cannot collect against the slab or enter the building.
Concrete generally performs best within a controlled temperature range. One curing overview identifies 50 to 90 degrees Fahrenheit as an ideal range. In North Carolina, heat, rain, humidity, and seasonal temperature changes may require shade, wind protection, blankets, or a revised pour time.
Maintain consistent thickness, proper slope, and adequate drainage
Inconsistent thickness can create weak areas, uneven curing, and changes in finished floor height. Establish elevations before pouring and use forms, screeds, laser levels, or depth checks to maintain the planned thickness throughout the space.
The surface also needs the correct slope. Interior rooms may require a level floor, while garages, utility rooms, patios, and other areas may need a controlled slope toward a drain or exterior opening. A slope that is too steep can affect flooring installation, while a slope that is too shallow may leave standing water.
Before installing floor coverings, verify that the finished surface meets the product requirements. A common flooring tolerance is no more than 1/8 inch in 6 feet or 3/16 inch in 10 feet, with no sharp bumps or low spots. These checks help prevent rocking planks, gaps, hollow areas, and visible imperfections.
Include reinforcement, vapor control, edge isolation, and joint planning
Reinforcement helps manage movement and support, but it must be correctly selected and positioned. Depending on the project, reinforcement may include wire mesh, rebar, or synthetic fibers. It should not be left on the ground or pushed to the wrong elevation during the pour.
Vapor control is especially important for slabs installed over soil or floors that will receive wood, laminate, or adhesive. Confirm the vapor barrier’s thickness, placement, seams, and compatibility with the overall assembly. Edge isolation can separate the slab from walls and other fixed elements, reducing stress transfer.
Plan control joints before placing concrete. Joints should follow the slab layout and account for openings, columns, changes in shape, and areas likely to experience movement. Curing needs vary with cement type, mixture, member size, weather, and curing method, as explained by Penn State’s concrete curing resource.
Wait until bleed water leaves the surface before finishing
Fresh concrete may release water as heavier solids settle. This is called bleed water, and it needs time to move to the surface and evaporate. Finishing too soon can trap water near the surface, weaken the top layer, and cause dusting, scaling, or delamination.
Watch the surface rather than following a fixed clock. Wind, sunlight, temperature, humidity, mix design, slab thickness, and placement rate all affect timing. Workers should avoid walking on or operating finishing equipment over visible water.
A slab may look dry before it has completed the curing process. As concrete curing guidance explains, a dry-looking surface does not mean the concrete is fully cured. Allow the surface to reach the proper stage before floating, edging, grooving, or troweling.
Avoid overworking the concrete or choosing an incompatible finish
Overworking the surface can bring excess water and cement paste to the top. This may create a weak, brittle surface that dusts, flakes, or fails under traffic. Use the correct finishing tools and make only the passes needed to achieve the specified result.
The finish should suit the space and its intended use. A polished surface may work well in an interior commercial area, while a textured or slip-resistant finish may be better for a garage, entry, or wet room. Stained and decorative finishes also require a clean, properly prepared surface and compatible sealers.
Do not select a finish based only on appearance. Consider traction, maintenance, sunlight, moisture, traffic, and cleaning chemicals. Direct sun and wind can speed evaporation, so protect the slab and adjust finishing practices when site conditions change.
Use compatible patching compounds, sealers, adhesives, and underlayments
Every product applied to the slab should work with the materials installed before and after it. A patching compound must bond to concrete and support the selected flooring. A sealer must be compatible with stains, adhesives, coatings, or future maintenance products.
Read technical data sheets and installation instructions before purchasing materials. Some adhesives require a porous surface, while others are designed for nonporous or sealed concrete. Underlayments can help with sound control or minor surface imperfections, but they cannot correct major settlement, moisture intrusion, or an uneven slab.
Professional preparation is often the difference between a clean result and recurring repairs. ValorCraft Flooring provides flooring installation services for LVP, hardwood, laminate, and glue-down flooring, with preparation based on the existing subfloor and selected materials.
Allow enough time for curing, polishing, sealing, and decorative finishing
Do not compress the schedule by treating concrete as finished immediately after placement. Setting, curing, drying, polishing, sealing, and flooring readiness are separate milestones. A slab may support limited activity while still holding too much moisture for hardwood flooring or adhesive.
Most concrete work needs at least seven days of curing under normal conditions, although the required period varies with the mix, weather, thickness, strength requirements, and intended finish. Decorative work may require additional time for grinding, staining, polishing, sealing, and drying between coats.
Build testing and inspection into the schedule. Ask the installer when the slab can accept foot traffic, furniture, coatings, or flooring. If the project has a fixed move-in or tenant date, schedule the work early enough to allow for weather changes and corrective preparation.
Confirm moisture and flatness before installing flooring
Before covering concrete, retest moisture and inspect the surface for flatness. Moisture readings should meet the requirements of the flooring, adhesive, sealer, and underlayment manufacturers. Depending on the product, the acceptable limit may be expressed as a moisture percentage, relative humidity reading, or calcium chloride result.
Flatness matters just as much. Use a straightedge or laser level to locate high spots, low areas, ridges, and sloped sections. Grind high spots and use a compatible patching or self-leveling compound for low areas. Do not expect adhesive or underlayment to hide major irregularities.
Flooring manufacturers set specific tolerances and moisture limits. A flooring installation guide emphasizes checking the substrate and keeping moisture within the product’s stated requirements. Record test results so the installation team can confirm the slab is ready.
Protect the slab and control access during curing
Fresh concrete and newly applied finishes need protection from foot traffic, pets, furniture, tools, water, dust, and impact. Use barriers and clear signs to keep people out of the work area. Coordinate access with homeowners, builders, property managers, tenants, and other trades before the pour begins.
Protective coverings can help shield nearby surfaces, but they must not trap moisture against a curing slab or damage a decorative finish. Ask the installer which coverings are appropriate and when they can be placed. Keep equipment and stored materials off the floor until the surface can safely support them.
Adhesive-installed flooring also needs restricted access during its initial cure. One installation reference recommends keeping the floor free from foot traffic for at least 24 hours so the adhesive can cure properly. Follow the specific product instructions because waiting periods vary.
Complete final contact, transition, and trim checks
The final inspection should cover more than appearance. Check that flooring has full contact with the prepared subfloor, particularly around room edges, doorways, transitions, stairs, and repaired areas. Hollow spots, movement, gaps, or loose edges may signal an installation or preparation issue.
Review transitions between flooring materials and confirm that the finished height works with doors, cabinets, appliances, baseboards, and stair components. Trim should cover the required expansion space without pinching the flooring. Check that stair treads, risers, nosing, and handrail areas are secure and aligned.
For plank flooring, inspect the layout, seams, perimeter spacing, and contact across the underside. Manufacturer guidance recommends checking for 100% contact between the underside of each plank and the subfloor. Complete these checks before furniture is returned or the space is handed back to the homeowner, tenant, or client.
Choose the Right Concrete Floor Installation Professional
The right professional depends on what your project requires. A new concrete slab, a damaged foundation, and flooring installed over an existing slab involve different materials, preparation methods, and areas of expertise. Clarify the scope before requesting estimates so you can compare companies fairly and avoid paying for work you do not need.
If your project includes flooring over concrete, choose a contractor who understands both the slab and the finished floor. Proper preparation affects moisture control, flatness, floor height, transitions, and long-term performance. ValorCraft Flooring serves homeowners, builders, property managers, and commercial clients across North Carolina with professional installation, subfloor preparation, trim work, and several flooring options. You can review ValorCraft Flooring’s services to see whether the team fits your project.
Decide whether you need structural concrete work, slab repair, or flooring installation
Start by identifying the condition and purpose of the concrete. If you need a foundation, load-bearing slab, major settlement repair, drainage correction, or structural reconstruction, consult a qualified concrete or structural contractor first. These projects may require engineering input, permits, excavation, reinforcement, or inspections beyond the scope of a flooring installation.
A flooring contractor may be the right choice when the slab is structurally sound but needs preparation before a finished floor goes down. Preparation can include removing adhesive, grinding high spots, filling cracks, correcting minor uneven areas, and installing an appropriate underlayment. A professional should tell you when a condition requires another specialist instead of covering the problem with new flooring.
Ask each contractor to describe the existing issue, the recommended solution, and any work another specialist must complete first. This division of responsibility helps prevent delays and makes the estimate easier to understand.
Look for licensed, insured professionals with concrete and flooring experience
Licensing and insurance provide important safeguards, but they are only part of the selection process. Ask for proof of current general liability coverage, workers’ compensation coverage, and any state or local credentials that apply to the work. You can also confirm contractor information through the North Carolina Licensing Board for General Contractors.
Experience matters just as much. Concrete flooring projects require careful attention to substrate condition, moisture, surface profile, adhesives, finish materials, and job-site safety. During grinding or cutting, contractors should follow appropriate silica dust controls to protect workers and occupants.
Request photos of comparable projects and ask how the company handles cracks, uneven areas, old adhesive, or moisture concerns. A reputable professional should explain the preparation process in plain language and provide a written scope of work rather than making broad promises.
Ask whether trained in-house crews or subcontractors perform the work
Find out who will be working in your home, building, or commercial space. Some flooring companies use their own trained crews, while others assign projects to subcontractors. Neither arrangement automatically guarantees or prevents quality, but you should understand who is responsible for the work and how communication will be handled.
Ask whether crew members are employees or independent installers, who supervises the project, and whether the company checks subcontractor insurance and experience. Confirm who will answer questions if the installation changes after preparation begins. A single point of contact can make it easier to approve repairs, clarify product choices, and address scheduling concerns.
ValorCraft Flooring describes itself as a veteran-owned, licensed, and insured company that uses professional in-house crews rather than subcontractors. That structure can support consistent workmanship and accountability from the estimate through cleanup. You can learn more about ValorCraft’s team before scheduling an evaluation.
Confirm experience with LVP, hardwood, laminate, glue-down floors, stairs, and trim
Concrete is only part of the project. The finished floor must also be installed according to the product manufacturer’s requirements. Ask whether the contractor has recent experience with luxury vinyl plank, hardwood, laminate, glue-down flooring, stair treads, baseboards, and other trim details.
Each material has different requirements. LVP may need careful attention to slab flatness and expansion space. Hardwood can require moisture testing, acclimation, and an approved installation method. Glue-down products depend on compatible adhesive, clean preparation, and suitable moisture conditions. Stairs require accurate measurements, secure attachment, and finished edges that match the surrounding floor.
Ask to see examples of similar work, including transitions between rooms and details around stairs, door casings, cabinets, and baseboards. A contractor experienced with several flooring systems can recommend an option suited to the slab and the way you use the space.
Request an estimate covering preparation, materials, labor, curing, cleanup, and timeline
A useful estimate should show more than a price per square foot. It should explain what the contractor will do before installation, which products are included, how labor is calculated, and what conditions could change the final cost. Ask whether the estimate includes furniture movement, tear-out, disposal, moisture testing, patching, grinding, underlayment, adhesive, trim, transitions, and cleanup.
If concrete work is involved, request details about forms, reinforcement, delivery, placement, finishing, curing, sealing, and site access. If flooring will be installed over an existing slab, ask how much preparation is included and what happens if the slab needs additional repair.
The schedule should identify product lead times, preparation days, installation dates, curing or acclimation periods, and the expected date for normal use. A written estimate with clear exclusions makes it easier to compare proposals and reduces the risk of unexpected charges.
Ask how the team will handle moisture, flatness, joints, transitions, and floor height
These details often determine whether a concrete flooring project performs well after installation. Ask which moisture test the contractor will use, where testing will take place, and what results are acceptable for the selected flooring and adhesive. A visual inspection alone cannot confirm that a slab is ready for floor coverings.
Discuss how the team will measure flatness and correct high or low areas. Ask how existing cracks, control joints, expansion joints, and perimeter gaps will be treated. The contractor should also explain how the new floor will meet tile, carpet, door thresholds, cabinets, stairs, and adjacent rooms.
Floor height deserves special attention. Added underlayment, adhesive, patching compound, or a thick flooring product can affect doors, appliances, baseboards, and transitions. Have the contractor identify these issues before work begins, then include the chosen solutions in the written scope.
Coordinate homeowner, builder, property-manager, commercial, or occupied-home schedules
A flooring project needs more than an installation date. It may involve product delivery, room clearing, slab preparation, inspections, furniture relocation, access restrictions, and time for curing or acclimation. Discuss these steps with the contractor before committing to a schedule.
Homeowners should ask when rooms need to be emptied and when pets and family members can return. Builders may need the flooring crew to coordinate with trim carpenters, painters, electricians, and cabinet installers. Property managers may need tenant notices, lockbox access, elevator reservations, and protection for shared areas.
Commercial work often requires scheduling around customers, employees, deliveries, fire exits, and operating hours. Ask how the crew will separate work areas, control dust and odors, protect nearby surfaces, and keep walkways safe. A detailed schedule limits disruption and gives everyone a clear plan when the property remains occupied.
Review workmanship standards, warranty details, financing, and follow-up care
Before signing, read the workmanship warranty and confirm what it covers. Ask how long coverage lasts, whether it applies to preparation and installation, and which issues are excluded. Manufacturer warranties may cover the flooring product but not improper installation, moisture-related damage, or an unsuitable substrate.
Discuss care requirements as well. Find out when the floor can receive furniture, how soon it can be cleaned, which products are safe, and whether the concrete finish requires resealing. For hardwood, LVP, laminate, or glue-down flooring, request written maintenance instructions that match the product installed.
Financing can also affect the project plan. Ask about available payment options, deposit requirements, progress payments, and the balance due at completion. ValorCraft Flooring invites customers to contact the team with project questions and estimate requests. Keep every proposal, product specification, warranty document, and care instruction with your project records.
Frequently Asked Questions
How do I know whether my concrete slab is ready for flooring?
The slab should be structurally sound, clean, dry, and sufficiently flat for the selected material. A professional should check for cracks, settlement, moisture, surface contamination, and uneven areas before installing LVP, hardwood, laminate, or glue-down flooring.
Can flooring be installed over an existing concrete slab?
Yes, many flooring types can be installed over concrete when the slab meets the product requirements. Preparation may include grinding, crack repair, patching, leveling, moisture testing, and installing a compatible underlayment or adhesive system.
How long should concrete cure before flooring installation?
There is no single timeline for every project. Concrete may feel hard enough for light foot traffic while still holding too much moisture for flooring. The installation team should follow the flooring manufacturer’s requirements and confirm readiness with appropriate moisture and flatness testing.
What flooring works best over concrete?
The right option depends on moisture exposure, room use, comfort, maintenance, floor height, and appearance. LVP and laminate suit many residential areas, while hardwood can work when the slab and installation system meet wood flooring requirements. Glue-down flooring may be practical for commercial or low-profile installations.
When should I call a structural professional instead of a flooring contractor?
Contact a structural or foundation professional when the slab has major settlement, wide or recurring cracks, sinking areas, water intrusion, movement near walls, or other signs of structural instability. Flooring preparation should begin only after serious slab or foundation concerns have been evaluated and addressed.