

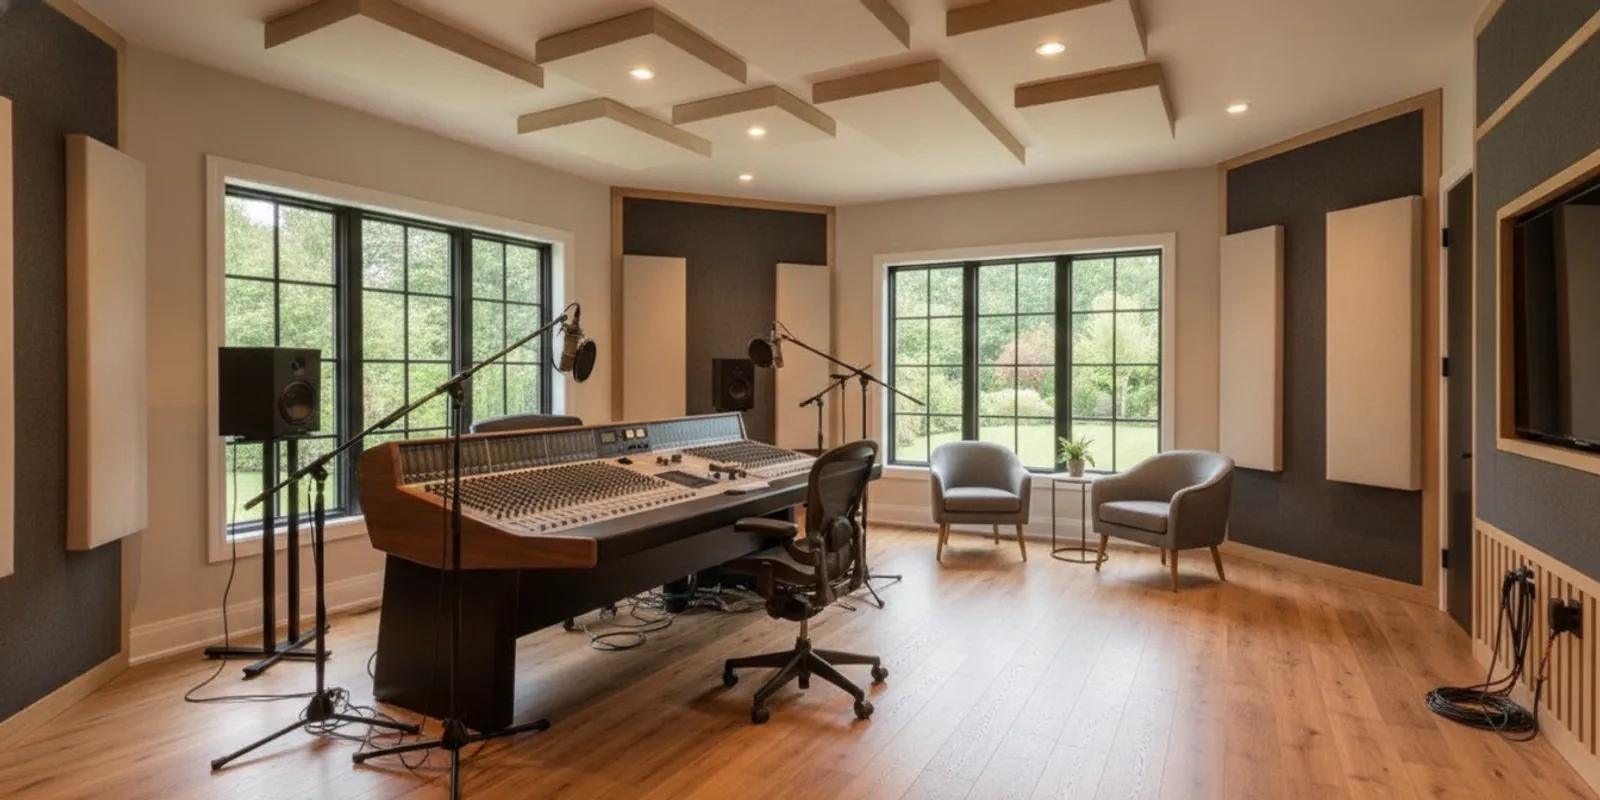
Choosing flooring for recording studios means balancing daily use, room acoustics, equipment movement, cleaning, and the condition of the floor beneath. A finish that looks right in a photo may not suit a tracking room, control room, rehearsal space, or shared production suite. Start by defining how each room is used, then compare material and installation choices against those needs.
What should studio flooring do?
Flooring is one part of a room’s design, but it affects more than appearance. It influences how chairs and cases move, how dust and spills are handled, how adjacent rooms meet, and how the room feels during long sessions. A hard, smooth surface generally reflects more sound than a soft covering. That observation does not make one finish universally right. The room’s purpose, treatment, furnishings, and intended sound all matter.
Begin with an inventory of activities rather than a favorite color or product photo. A control room may need stable chair movement and convenient cable access. A tracking room may host stands, instruments, repeated foot traffic, and changing room setups. A rehearsal room can have frequent equipment movement and cleaning. A hall or entry takes tracked-in grit and connects several finish heights. Write these conditions down room by room; one material need not serve the whole building.
- Control room: Consider chair casters, desk and rack placement, cable routes, and whether a rug belongs in the acoustic plan.
- Tracking room: Account for instrument stands, performer movement, and the room response being pursued.
- Rehearsal or shared room: Plan for repeated use, cleanup, and moving gear without expecting the finish to cushion every impact.
- Entry and circulation: Consider debris, thresholds, and transitions into production rooms.
Ask the studio designer or acoustician whether the proposed finish is already included in the acoustic plan. The floor interacts with room size, shape, walls, ceiling, furnishings, and treatment. A flooring selection alone cannot promise a particular recording result. Keep the acoustic brief and the installation brief connected, while recognizing that each addresses different questions.
How do materials compare for studio use?
Material names are only a starting point. Product construction, finish or wear layer, installation system, substrate, and care instructions all affect whether a floor fits a particular room. ValorCraft Flooring offers luxury vinyl plank installation, laminate flooring, and hardwood flooring. Suitability depends on the specific product and project conditions.
| Option | Potential fit | Questions to resolve |
|---|---|---|
| Luxury vinyl plank | Hard-surface option where cleanability and a finished appearance matter. | Which installation system fits the product and substrate? Are removal, leveling, or transitions separate scope items? |
| Laminate | Floating-floor option that may suit some interiors when product requirements and room conditions align. | What do manufacturer instructions say about moisture, underlayment, room use, and nearby wet areas? |
| Hardwood | Natural-material option where appearance and the maintenance plan support it. | Is the selected wood suitable for the substrate and installation method? What finish care is expected? |
| Existing floor with area rugs | May retain a serviceable surface while furnishings or treatment are adjusted. | Will rugs affect access, equipment movement, cleaning, or the acoustic plan? |
This comparison is a planning tool, not a promise that any option suits every room. Some products are designed for floating installation; others may use an adhesive system. Product documentation and site conditions determine the method. For glue-down work, confirm substrate condition and product-compatible adhesive. Review glue-down flooring as one installation approach, not as a universal recommendation.
Imagine a studio with a control room and tracking room. The owner may prefer one consistent look, while the acoustic designer recommends a specific balance of reflective and absorptive surfaces. Do not assume that one finish should cover both rooms. List each room’s use, ask the designer to confirm the surface plan, and request material options that meet product requirements. This keeps appearance in the discussion without allowing it to substitute for acoustic or installation decisions.
How should you assess each option?
Start with the product’s intended use and installation instructions. Ask for the exact product or product category being considered, not just a generic label. “Vinyl,” for example, does not identify whether the system is floating or adhesive-installed, nor does it describe every performance characteristic. A product sheet can help the owner and contractor discuss requirements without relying on assumptions based on a material name.
Next, consider the room’s routine. Will it be swept after every session, or does the team need to manage occasional spills? Are rolling cases moved daily, or only during occasional equipment changes? Does the room remain mostly fixed, or does it change from recording to rehearsal use? These are practical questions, not claims that one finish eliminates maintenance or damage. They help narrow the options and identify what needs protection or a separate procedure.
Then examine the interaction between finish and furnishings. A rug, chair mat, or equipment platform may change movement and sound behavior. It can also create an edge that cases catch on, interfere with a door, or complicate cleaning. Before ordering a large rug or mat, include its dimensions and intended placement in the room plan. If acoustic treatment is involved, get the designer’s view before treating a rug as a substitute for specified treatment.
How does sound behavior affect the choice?
A room with a hard floor may sound more reflective than a room with soft floor coverings. It does not follow that hard flooring is automatically unsuitable or that carpet automatically solves acoustic problems. Recording spaces need a planned response. Ask the person responsible for the acoustic design how the floor, rugs, and other finishes work together. A useful conversation identifies what the design is trying to accomplish, rather than asking a flooring installer to guarantee a sound result.
Separate airborne sound isolation from treatment within a room. A finish floor by itself is not a sound-isolation system. Isolation can depend on the construction of the floor assembly and surrounding building elements. If the project has vibration or sound-isolation requirements, involve an appropriately qualified design professional before selecting the decorative finish. Clarify whether the concern is sound within the room, sound entering or leaving it, or vibration transmission; these are different project questions.
The distinction matters because a surface replacement may change the visible finish without changing the underlying building assembly. If the brief calls for a floating or isolated construction, document the specified assembly and identify which trade is responsible for each layer. Do not assume that ordinary underlayment, a resilient floor covering, or a rug delivers a particular isolation outcome. The architect, acoustician, or other design professional should define that requirement, and the estimate should describe the flooring scope that relates to it.
Equipment adds practical concerns. Rolling cases and chairs can mark some finishes or catch at uneven transitions. Heavy racks, consoles, or instruments may require the project team to review the floor assembly and load conditions. Do not treat a surface finish as structural reinforcement or vibration control. If equipment has unusual support or isolation requirements, document those before the estimate so the installer understands constraints and the appropriate specialist can advise.
What if the room needs both acoustic treatment and a hard finish?
That can be a design question rather than a contradiction. The acoustic plan may call for a hard surface in one area and treatment elsewhere, or may specify rugs or movable absorptive elements. Ask for the intended layout and any restrictions on rug size, placement, or permanence. Then check whether the proposed floor finish and transitions allow the planned arrangement.
Keep a record of the design decisions. A simple room sketch can mark the control desk, primary listening position, instrument area, rug footprint, doors, and cable paths. This helps the flooring discussion stay concrete. It also makes later changes visible: moving a desk or enlarging a rug may affect how the room is used, even if the installed surface remains unchanged. The flooring contractor can address the floor work; acoustic performance and treatment recommendations remain with the design professional.
What should be checked before installation?
Planning begins with the existing floor and substrate. A surface that looks flat may still have conditions that affect the selected product or installation system. Identify what can be observed, what needs testing, and which scope items cannot be confirmed until existing material is removed. A useful assessment records uncertainties instead of burying them in a general allowance.
- Identify the existing surface. Note what is installed, whether it is loose or damaged, and whether there may be multiple layers. If removal is needed, clarify what is included for demolition and disposal. For older flooring or adhesive suspected of containing asbestos, do not disturb it; obtain qualified assessment and clearance first.
- Discuss the substrate. Ask how flatness, securement, cracks, and observed conditions will be evaluated. Applicable limits depend on the selected material and manufacturer instructions.
- Clarify moisture assessment. If the product or project calls for testing, establish who performs it, when, and how results affect scope. Do not assume one threshold applies to every flooring system.
- Confirm the installation method. Floating, click-lock, and adhesive systems have different requirements. Match the method to the product and substrate.
- Plan room readiness. Discuss racks, instruments, furniture, cables, access, and which items must be moved before work.
- Map transitions and trim. Record doorways, adjoining rooms, thresholds, baseboards, and any changes in height that need a defined finish detail.
Subfloor work is a central part of planning, not a cosmetic afterthought. Review the scope of subfloor preparation and clarify whether repair, leveling, or moisture-related work is included, excluded, or conditional. The written estimate should explain how preparation is handled and how additional work would be discussed.
Consider a hypothetical room with an existing resilient finish that appears intact, where the owner wants a floating floor. The proposal should identify whether the old finish remains, whether its condition and height are acceptable under product instructions, and how door clearances and transitions will be handled. If removal reveals an unexpected substrate issue, the project plan should state how that discovery will be documented and approved before additional work proceeds. This is more useful than assuming every existing surface can be covered without review.
How do you prepare a useful site record?
Before asking for an estimate, collect information that helps describe the space. Record room names and approximate dimensions, the current surface if known, visible damage, doors, adjacent rooms, and any access limits. Photos can show the floor, transitions, equipment placement, and narrow routes. They are useful context, not a substitute for site review or testing.
Mark areas that cannot be emptied easily. For instance, a console may be wired into the room, a rack may contain connected equipment, or an instrument may need special handling. Note who can disconnect or move each item. Do not expect a flooring scope to include electronics work, lifting heavy equipment, or storage unless the written proposal expressly says so. A clear inventory allows responsibilities to be assigned before the work date.
Also gather any available product or construction documents. If the room is part of a new build or renovation, plans may identify floor heights, substrate types, or specified assemblies. Share relevant information with the project team, but ask which documents govern if drawings and field conditions differ. For an existing studio, a simple list of known repairs and past moisture events may be helpful, but do not treat recollection as a substitute for testing when the product or project requires it.
How should a studio plan around equipment and downtime?
Studios may have scheduled sessions, shared rooms, and equipment that is difficult to relocate. Build a room-by-room work plan before choosing an installation date. A flooring contractor can estimate flooring scope, while the owner or project manager coordinates studio operations, equipment handling, and acoustic decisions with the right team.
- List each room, its use, approximate dimensions, access restrictions, and adjoining surfaces.
- Identify equipment that stays in place, equipment that must move, and who is responsible for each move.
- Map access routes for racks and instruments, and discuss how cables, doors, and entry areas will be protected.
- Coordinate the work sequence with sound treatment, painting, doors, base or trim installation, and other trades.
- Confirm product delivery, site readiness, and any manufacturer-directed acclimation or installation conditions.
- Agree how cleanup, completion review, and handoff will be handled.
Do not assume furniture moving, heavy equipment handling, electronics disconnection, storage, or return placement is included. Discuss those responsibilities explicitly and record them in the project plan. Cure or access restrictions depend on the system and should be confirmed from product instructions and the project-specific plan.
For a multi-room studio, consider phasing. A room-by-room sequence may help preserve access to other areas, but it can also add transitions, repeated setup, or coordination requirements. Decide which rooms are operationally essential, whether temporary access between them is needed, and how materials will be staged. Do not assume phasing shortens the overall schedule; ask the contractor to explain the proposed sequence and dependencies.
What does a room-by-room sequence look like?
Start by identifying the room that can be taken offline first and the spaces that must remain available. If the control room is essential to ongoing work, perhaps another room can be addressed first; if access paths run through a tracking room, the sequence may need to account for that. The right order depends on the layout, scope, material, and operational needs. Ask the project team to sketch the order and note when each space is unavailable, rather than relying on a general promise of minimal disruption.
Set a clear readiness checkpoint for each phase. Before a room is handed over, confirm equipment and furniture responsibilities, cleared floor area, product delivery, access, and any work by other trades. After installation, follow product-specific instructions about when people or equipment may return. Keep the next room’s materials and route from interfering with the completed surface. These are coordination steps, not a guarantee of a particular completion time.
Consider how temporary storage will work. Instruments, stands, cases, and chairs may need a dry, secure place, and moving them twice can create extra handling. Identify whether items remain in the building or leave the site, who has authority to disconnect equipment, and how the room is secured. If the work area is in a shared commercial property, clarify building access and any rules that affect deliveries, noise, or staging.
How should rolling equipment and cables be considered?
Map the routes used most often: entry to control room, storage to tracking room, and any path across thresholds. Look for abrupt height changes, narrow turns, and door swings. Bring those details into the transition discussion. A smooth-looking transition is not automatically compatible with every adjacent floor height, so the installer needs to see the actual interfaces and understand how carts or cases use them.
For chair casters, describe the chair type and frequency of movement. Ask whether the selected finish and any protective mat fit the intended use and product guidance. Avoid assuming that a mat is harmless to every floor or that a particular surface cannot be marked. Follow the manufacturer’s care recommendations and consider a trial arrangement if the room layout is still being developed.
Plan cable routes independently of the floor installation. Cables should not be trapped under trim or placed where they create trip hazards. If floor boxes or other built-in services are present, identify them before work begins and confirm which trade handles adjustments. A floor plan that marks cable paths and equipment footprints can reduce last-minute changes and help keep access clear.
What should the written estimate include?
A useful estimate explains the proposed work, material assumptions, and boundaries of the price. It should let a reader compare proposals by scope rather than headline total. Studio flooring can involve coordination beyond a simple room refresh, so ask for clear answers before approval.
- Rooms and approximate areas covered, with product and installation method identified.
- Removal and disposal assumptions for existing material, if applicable.
- Preparation included in the base scope and how additional substrate work will be assessed and approved.
- Moisture evaluation or mitigation assumptions, including exclusions.
- Underlayment, adhesive, transitions, trim, and finish details included in the proposal.
- Responsibilities for furniture and equipment, protection, site access, and sequencing.
- Conditions that may change scope after existing material is removed or substrate examined.
- Project-specific timing expectations and restrictions on room use after installation.
Demolition, haul-off, leveling, moisture mitigation, equipment moves, and trim are not automatically bundled. The estimate should state what is included and what needs approval as added or conditional work. For commercial studio or multi-room projects, clarify access, specifications, phasing, and coordination with other trades. ValorCraft’s commercial flooring information can begin that discussion, while the written proposal should reflect the actual site.
When reviewing a proposal, distinguish between a defined base scope and a conditional item. A defined scope might name the rooms, material, installation system, and visible trim work. A conditional item might explain that substrate repairs are not included until an existing layer is removed and the condition can be examined. Ask what evidence triggers added work, who approves it, and how the amount or revised scope will be communicated. The answer should be specific enough for the owner to decide before work proceeds.
How can you read allowances and exclusions?
An allowance is not the same as a confirmed inclusion. Ask what quantity or condition it covers, how it was estimated, and what happens if actual site conditions differ. For example, if preparation is described as an allowance, find out whether it refers to a defined amount of patching or an open-ended category. The proposal should explain how an adjustment is presented and approved.
Exclusions deserve the same attention as included work. If removal is excluded, ask whether the existing floor can remain under the proposed system and who will arrange removal if it cannot. If furniture moving is excluded, assign a responsible person and a completion date. If trim painting is excluded, coordinate the painter and sequence. For unusual acoustic assemblies or specialty equipment, identify the responsible designer or trade instead of leaving ownership unclear.
Use a short written question list and ask for answers in the estimate or a project note. Verbal assumptions can be forgotten when the job has multiple rooms and participants. Written scope does not eliminate every unknown condition, but it gives the owner a shared reference for what is planned and how discoveries will be handled.
How can you compare flooring proposals?
Compare proposals line by line. Two totals may include different products, preparation assumptions, disposal, transitions, and responsibilities. If one proposal is less detailed, request clarification rather than assuming missing work is included.
- Check that both proposals cover the same rooms and areas.
- Compare product type, installation method, and product-specific conditions.
- Match removal, disposal, and substrate preparation line items.
- Check transitions, trim, and adjacent-room details.
- Compare who handles equipment, furniture, protection, and access.
- Review exclusions and allowances, and ask how unknown conditions will be handled.
- Confirm that schedule and room-use restrictions are project-specific and understood.
For a more useful estimate conversation, provide room use, existing floor type if known, approximate area, photographs when helpful, equipment constraints, and relevant acoustic requirements. ValorCraft serves the Piedmont Triad, including Greensboro, High Point, Winston-Salem, Lexington, Kernersville, and Thomasville; broader service is subject to project qualification. Readers can review the company’s background and approach while preparing to discuss project needs.
What is a practical comparison example?
Suppose two proposals cover a control room and a tracking room. One identifies a product and installation method but excludes removal and equipment moves. The other includes removal but describes preparation only as “as needed.” Neither can be compared fairly from the total alone. Ask both providers to clarify the same items: existing-floor removal, disposal, substrate assessment, transitions, equipment responsibilities, and approval process for concealed conditions.
Then compare how each proposal handles the studio’s actual constraints. Does it identify which rooms are included? Does the plan account for the doorway between rooms and the route used to move cases? Does it state who coordinates with the acoustic designer? Are product instructions and room-use restrictions available? A more detailed proposal may not be the lower one, but the detail lets the owner see what is being purchased and what remains unresolved.
Do not treat a missing line as proof that a task is included at no additional charge. Ask for a direct answer. Similarly, do not assume a large contingency is automatically wasteful; determine which unknown condition it addresses and whether testing or site inspection can reduce uncertainty. The goal is a scope that can be understood, not a false sense of precision before concealed conditions are visible.
How can you map the decision before requesting an estimate?
A short room brief can prevent an estimate conversation from getting stuck on incomplete information. It need not be a formal specification. Its purpose is to connect studio use with flooring questions a contractor can address and acoustic questions that belong with the designer.
- Room identity: Give each room a name and approximate dimensions. Mark doors, shared corridors, and adjoining finishes.
- Use pattern: Note whether the room is used for recording, mixing, rehearsal, storage, or several activities. Mention expected chair and case movement.
- Acoustic direction: Record written guidance from the designer, including whether floor coverings or rugs are already planned. Do not translate a vague preference such as “less echo” into a guaranteed flooring result.
- Current condition: Describe the visible finish, damage, loose areas, and known history. Photos can show transitions and equipment, but do not replace site assessment.
- Operational limits: Identify times when the room must remain accessible, building access rules, and equipment that cannot be moved without specialist help.
- Finish preferences: Bring samples or describe color and surface expectations, but keep them separate from performance requirements so tradeoffs are visible.
For instance, a mixing room may use rolling chairs daily while a tracking room may be reconfigured often. Both can have the same substrate yet call for different discussions about rugs, movement, wear, and transitions. A written room brief makes differences explicit without assuming one product must solve every concern.
A sample room brief
A concise brief might say: “Control room, existing floor appears to be resilient material, daily rolling-chair use, desk and rack remain in place, doorway connects to a corridor, and the acoustic designer is reviewing a rug near the listening position.” This does not decide the product. It gives the installer and designer concrete conditions to evaluate.
A tracking-room note might say: “Room is reconfigured for different instrument setups; stands and cases move through the entry; existing finish has a loose area near one wall; owner wants the acoustic designer to advise on rugs.” Again, this is not a technical specification or a promise about performance. It indicates what needs inspection and coordination.
For a rehearsal room, record the expected traffic, cleanup routine, equipment route, and any adjacent finish that needs a transition. For a shared suite, identify which users control the room and who approves downtime. If the project includes a new build, include plan references and product requirements provided by the design team. Organizing these facts before a site visit helps direct questions to the right person.
How do different studio rooms change the discussion?
Room labels are helpful, but actual use matters more than the name on a door. A “control room” that doubles as storage may have different movement patterns than one with a fixed desk and no cases. A “live room” might host a small group or frequent equipment changes. Describe what people do in the space, how often they move items, and what limitations they face.
Control and mixing rooms
Start with chair movement and the desk footprint. Identify whether a chair mat is planned, whether the desk is fixed, and whether floor boxes or cable paths are involved. Ask the acoustic designer how the floor surface and any planned rug relate to the listening area. Consider how equipment access will work during installation if desks or racks remain. If they must move, assign the person qualified to disconnect and reconnect electronics.
Also consider the threshold at the room entrance. Rolling chairs may not cross it, but cases and service carts may. Record adjacent floor heights and door clearance, and ask how the transition will be finished. If the control room is the final space that must return to use, incorporate that priority into phasing rather than assuming it can be completed in a particular number of days.
Tracking and performance rooms
These rooms may be rearranged between sessions. Document where stands, amplifiers, instruments, and cases typically travel, along with any planned floor coverings. Ask the acoustic professional whether the intended surface and rug arrangement are consistent with the design. Consider how the floor will be cleaned around stands and furniture, and whether temporary equipment placement creates concentrated contact points that need review.
Keep the expectation realistic: a finish may tolerate ordinary use, but no surface should be described as immune to dents, scratches, or marking. If an instrument or cabinet has special feet, wheels, or isolation devices, ask the equipment supplier or designer about support requirements. Provide that information when discussing the flooring assembly and installation sequence.
Rehearsal and multipurpose rooms
A multipurpose room can have changing loads and routes. Identify whether it is used for rehearsal, instruction, recording, storage, or events. Note where chairs and equipment are stacked, how often they move, and whether the space needs to remain open between sessions. A room that serves several functions may benefit from a separate, room-specific selection discussion rather than borrowing assumptions from the control room.
Make cleanup expectations explicit. Who sweeps or wipes the floor, what products are used, and how are spills handled? Follow the selected product’s care instructions and avoid introducing unapproved cleaners. The purpose is not to claim one material is maintenance-free, but to choose a finish whose care routine is practical for the people responsible for the room.
Entries, corridors, and support spaces
Entry routes connect the studio to the rest of the building and may receive debris from outdoors. Corridors also carry cases and equipment between rooms. Include these spaces in the plan if their floors or transitions are changing. A carefully selected room finish can still be inconvenient if a connecting threshold catches wheels or interrupts a route.
Ask how the project handles changes in height at each doorway and where trim is required. For adjoining spaces with different materials, identify the exact boundary and whether the transition is in scope. Keep a plan or photo set that labels each junction. That simple record can help prevent a doorway from being omitted when a proposal lists rooms by name.
What questions should be answered before choosing?
- Has the acoustic designer reviewed the proposed finish and any planned rugs?
- What product and installation system are proposed for each room?
- Which site conditions could change preparation scope?
- Who is responsible for equipment moves and protection of cables or fixtures?
- What is included for removal, disposal, transitions, and trim?
- Which product instructions govern moisture, flatness, installation, and room use?
- What steps must be completed before the studio resumes normal use?
- How will newly discovered conditions be documented and approved?
Questions for the acoustic or project design team
Ask whether flooring is specified as part of the room’s acoustic design, whether area rugs are planned, and whether any special floor assembly is required for isolation or vibration. Request a drawing or written note that identifies the relevant area and responsibility. If a specific performance objective is important, ask the design professional to state how it is evaluated; do not substitute a flooring product label for that design criterion.
Questions for the flooring estimate
Ask which product and installation method are proposed, what preparation is included, how removal and disposal are handled, and what happens if concealed conditions are found. Confirm who moves equipment and furniture, how transitions and trim are addressed, and what room-use restrictions apply after installation. Ask for unresolved assumptions to be listed, not left implicit.
Discuss your studio flooring project
Flooring decisions are easier to manage when room use, acoustic intent, product requirements, substrate conditions, and installation responsibilities are considered together. Request a written estimate that identifies the scope and the questions that still need resolution.