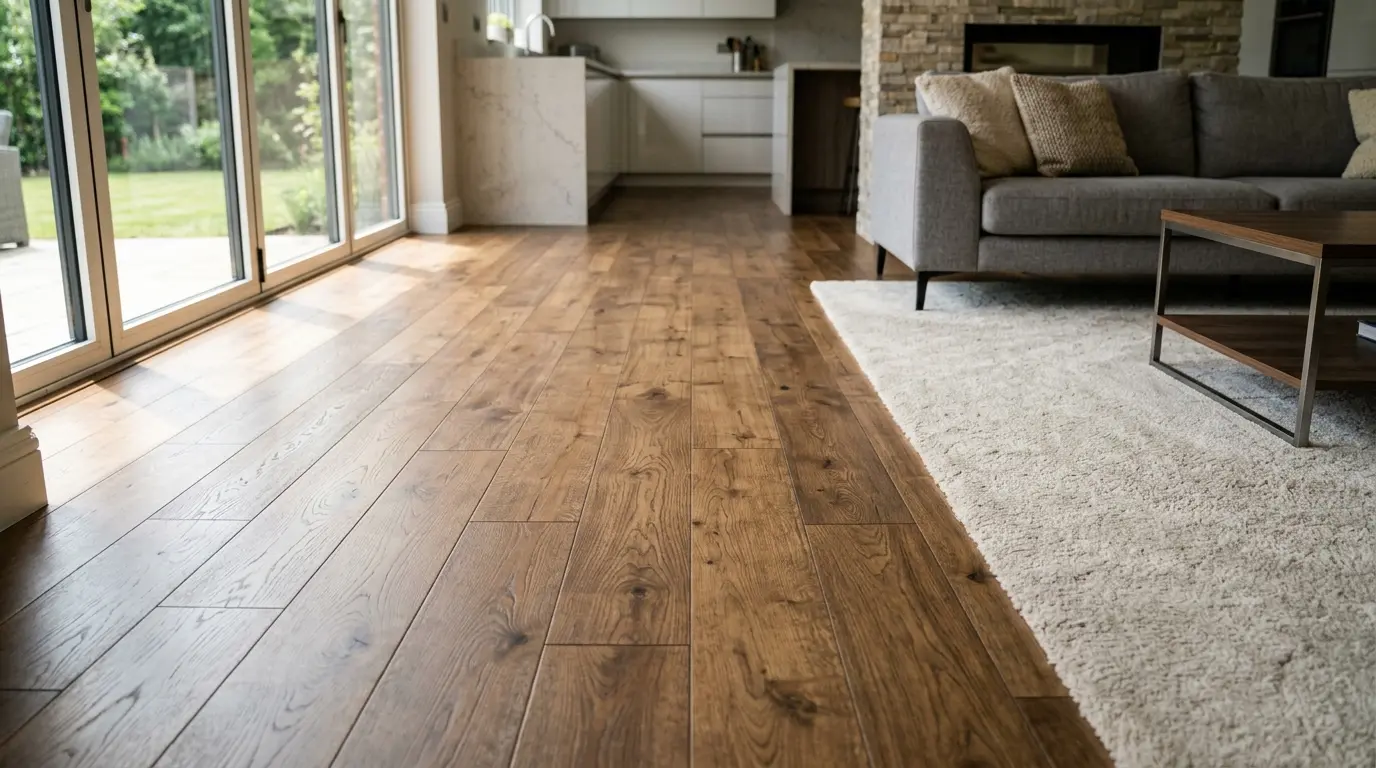

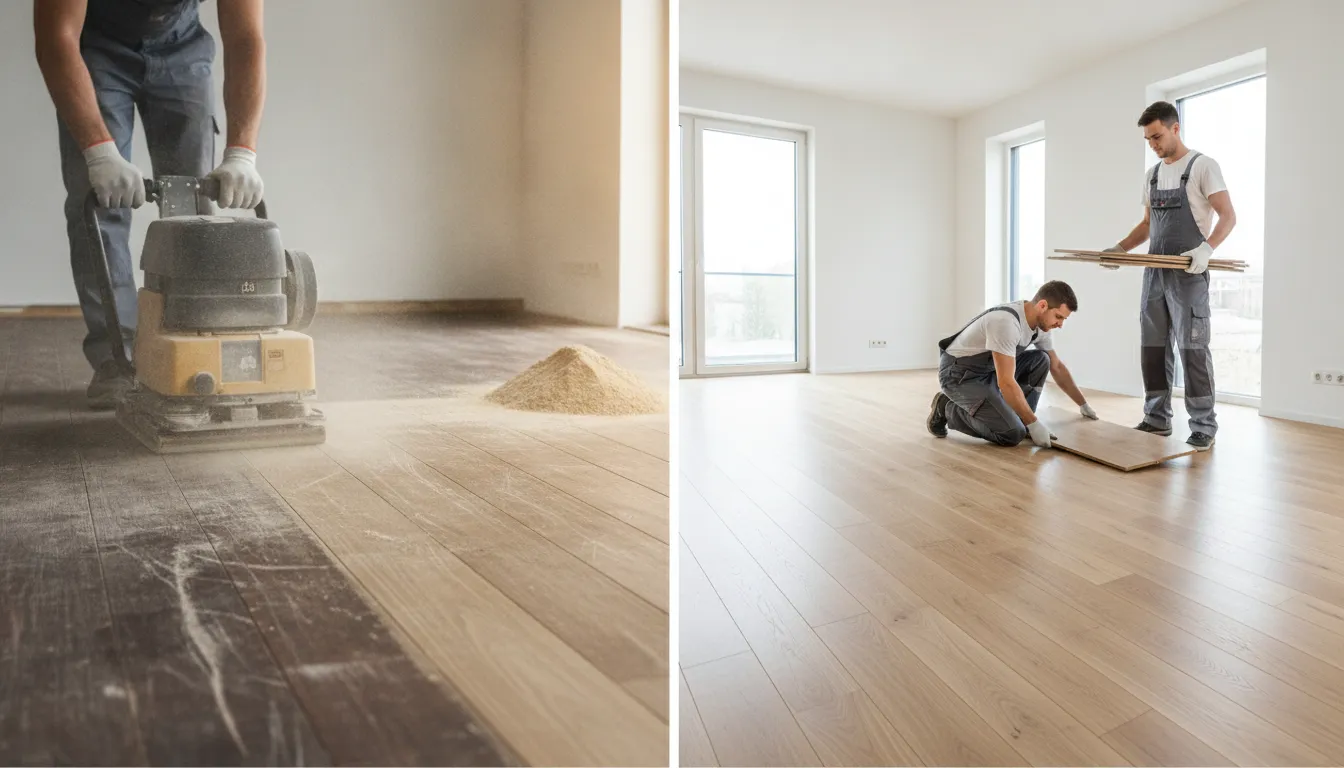
A hardwood floor can show years of family life: scuffs in the hallway, faded patches near windows, or boards that creak underfoot. Some of these signs are surface wear; others may point to damage beneath the finish. That’s why hardwood floor sanding vs replacement isn’t a decision to make based on appearance alone. Sanding can renew sound boards, but it won’t fix a moisture problem or stabilize a damaged subfloor. Replacement offers new material, though it involves more work and cost. We’ll walk through the signs to check, how each process works, and the questions to ask a flooring contractor before planning work in your North Carolina home.
Key Takeaways
- Choose based on the damage: Surface wear may suit a recoat or sanding, while damaged boards, moisture, or subfloor issues may require repairs or replacement.
- Check the floor’s sanding limits: Wood type, remaining wear layer, and past sanding help determine whether refinishing is possible.
- Request an on-site assessment and written estimate: Confirm the recommended work, repairs, materials, costs, and timeline before approving the project.
Hardwood Floor Sanding vs. Replacement: What’s the Difference?
Sanding and replacement can both refresh a hardwood floor, but they address different conditions. Sanding removes the existing finish and, when needed, a thin layer of wood. The floor can then receive a new stain and protective coating. Replacement means removing the old boards and installing new flooring. Between those options, a screen-and-recoat may work when the finish looks dull or lightly scuffed but the wood itself is in good condition.
The best choice depends on the floor’s construction, remaining wood thickness, and damage. Surface wear may be a good fit for refinishing, while loose boards, deep water damage, or problems with the subfloor may call for repairs or replacement. In some cases, replacing just a few damaged boards can preserve the rest of the floor. A flooring professional can assess the wood and explain which work makes sense for your home.
It also helps to consider the look you want. Refinishing can refresh the existing wood and change its stain color, while replacement allows you to select different boards, wood species, or a new style. The sections below explain what each option involves and what to check before making a decision.
Sanding Removes the Finish and a Thin Layer of Wood
During a full refinish, a flooring crew sands off the old protective finish and removes a small amount of the wood’s surface. This can reduce the appearance of scratches and scuffs, and may address some surface stains. After sanding, the floor can be stained and sealed with a new protective finish. The result depends on how deep the damage is and how much usable wood remains.
Sanding will not correct every issue. It cannot stabilize a loose subfloor, stop a moisture problem, or restore boards that are badly warped or structurally weak. Before work begins, have the floor checked to confirm it can be sanded safely. This refinishing overview explains how sanding removes the existing finish and surface marks before a new coating is applied.
Recoat Floors Without Full Sanding
If the wood is sound and the finish is only dull or lightly scuffed, a screen-and-recoat may be worth considering. The contractor lightly abrades the existing finish to help a new coat bond, then applies a fresh protective layer. Because this process skips the heavier sanding used in a full refinish, it may require less work.
A recoat is not designed to remove deep scratches, dark stains, or damage that has reached the wood. The existing finish also needs to be in suitable condition for the new coating to adhere. A flooring professional can inspect the surface and determine whether a recoat is appropriate. Ask what the estimate includes, such as surface preparation, finish, and repairs. A refinishing cost guide describes screen-and-recoat as a lighter option than full sanding, though the cost for your project will depend on its size and condition.
Replace Existing Flooring With New Boards
Replacement involves removing the existing flooring and installing new boards. It may be the right option when the hardwood has extensive damage, has too little usable wood for another sanding, or no longer suits your preferred style. New flooring gives you the opportunity to choose a different species, board width, color, or finish. The differences between refinishing and replacement include the design flexibility that comes with new boards.
The work also involves preparing the space beneath the flooring. The crew removes the old boards, checks the subfloor, and addresses needed repairs before installation. Trim, transitions, stairs, and nearby rooms may affect the scope as well. If moisture contributed to the damage, identify and address its source before installing new wood. Otherwise, the new floor could face similar problems. Ask for a written estimate that clearly lists removal, subfloor preparation, installation, and related carpentry work.
Repair Individual Boards to Avoid Full Replacement
When damage is limited to a small area, replacing individual boards may be an alternative to replacing the entire floor. A flooring professional can assess whether damaged boards can be removed and matched with new ones, then determine if the surrounding area needs sanding or refinishing. This approach may preserve sound flooring in the rest of the room.
The cause of the damage matters. Water can lead to staining, cupping, or uneven boards, while impact can leave chips or splits. Before installing replacement boards, the contractor should check that the subfloor is stable and that the area is dry. If moisture remains, new boards may be affected too. Read about signs of serious hardwood damage, then ask a flooring professional whether a targeted repair is practical for your floor.
Check Refinishing Limits for Solid and Engineered Hardwood
Solid hardwood is made from a single piece of wood, but it cannot be sanded indefinitely. Each full sanding removes some material. A standard three-quarter-inch solid hardwood floor may often be refinished several times, sometimes around four to six, but the actual limit depends on its condition, past sanding, and remaining thickness.
Engineered hardwood has a real-wood top layer over a layered core. Whether it can be refinished depends largely on the thickness of that top layer and the manufacturer’s guidance. Some engineered floors can handle sanding, while others allow limited refinishing or none at all. Have a professional inspect the floor and, if possible, check its product details before choosing. This refinishing guide also highlights the importance of assessing the floor’s thickness and condition before deciding whether to refinish or replace.
Can You Sand and Refinish Your Hardwood Floors?
Sanding and refinishing can refresh hardwood with surface wear, but it isn’t the right solution for every floor. Check the finish, the condition of the boards, and how much wood remains before deciding. These clues can help you prepare questions for a flooring professional, who can assess the floor in person and recommend the right work.
Look for Scratches, Scuffs, Dents, and Worn Finish
Fine scratches, scuffs, and dull patches often affect the finish more than the wood itself. If the boards feel solid and most of the damage is on the surface, sanding and refinishing may restore a more consistent appearance. Floors by the Shore describes minor scratches, scuffs, and fading as signs that refinishing may be worth considering.
Dents need a closer look. Shallow marks may become less noticeable after sanding, while deep dents can remain visible or require board repair. Check high-traffic areas, such as hallways and doorways, and note whether damage is widespread or limited to a few boards. This information can help a contractor recommend whether to refinish the full floor or repair specific areas.
Check Whether Fading Is Limited to the Finish
Sunlight and everyday use can change the color and sheen of hardwood over time. Compare areas exposed to sunlight with spots that have been protected by rugs or furniture. If the difference appears to be mostly in the finish, refinishing may help create a more even look. However, sunlight can also change the wood’s color, so a new finish may not make every board match perfectly.
Pay attention to dark patches as well as fading. Discoloration can come from spills or moisture that reached the wood, and sanding may not remove a stain that has penetrated deeply. Traditional Hardwood Floors explains how sunlight and daily use affect hardwood color. A professional can help determine whether the issue is surface wear or a deeper stain.
Note Deep Stains, Missing Finish, or Bare Wood
When the finish wears through, bare wood is more exposed to spills and everyday wear. Sanding and refinishing may still be an option if the boards have enough material remaining and are otherwise in good condition. Deep stains are less predictable: sanding may reduce some discoloration, but marks that have soaked into the wood can remain. Ask what results are realistic before choosing a stain or finish.
Take note of how much of the floor is affected. A few damaged boards may be repairable, while widespread staining or deterioration can make replacement worth discussing. District Floor Depot recommends weighing replacement when a substantial area is damaged. The right choice depends on the floor’s condition, available repair options, and the scope of the work.
Check Whether Boards Feel Firm, Flat, and Secure
Walk across the room and notice any soft spots, raised edges, or boards that shift underfoot. These signs can point to loose boards, subfloor problems, or moisture damage rather than ordinary surface wear. Refinishing can improve a floor’s appearance, but it won’t stabilize loose boards or correct a damaged subfloor. Those issues may need attention before sanding begins.
Small gaps can appear as wood responds to seasonal changes, but persistent gaps, uneven areas, or a spongy feel deserve a closer inspection. Identifying movement and stability issues early helps clarify whether repairs should happen before refinishing. ValorCraft Flooring’s hardwood services include sanding, refinishing, and subfloor preparation, so an assessment can account for both the visible surface and the floor beneath it.
Confirm the Wear Layer and Sanding History
Find out whether your floor is solid or engineered hardwood, and whether it has been sanded before. Solid hardwood generally has more material available for future sanding. Engineered hardwood has a real-wood wear layer over a layered core, and the thickness of that layer determines whether sanding is suitable. Product records or installation details can help a contractor identify what you have.
Previous refinishing matters because each sanding removes some wood. If the floor has been sanded several times, it may not have enough material left for another full sanding. Cavalieri Flooring notes that three-quarter-inch solid hardwood can often be refinished multiple times, though the floor’s actual condition and remaining thickness are key. A professional can assess the wear layer and discuss sanding, a lighter recoat, board repairs, or replacement.
When Does Hardwood Damage Require Replacement?
Not every damaged hardwood floor needs to come out. Scratches and worn finish may respond well to sanding, but warped boards, soft spots, and signs of ongoing moisture can point to deeper problems. Look for changes across the floor, not just one visible mark, and identify what caused the damage before choosing a repair.
Watch for Buckling, Cupping, Warping, and Persistent Gaps
Cupping, when board edges sit higher than the center, and buckling, when boards lift from the subfloor, can indicate moisture-related movement. Warped boards and gaps that remain between planks may also suggest the wood has changed shape or become unstable.
Sanding can smooth the surface, but it cannot restore boards that have warped or correct the cause of movement. Extensive water damage, rot, and large gaps may make replacement a better choice, as A Step Above Floors explains. A flooring professional can assess whether the damage is limited to a few boards or affects a larger area.
Look for Soft, Spongy, Split, or Loose Boards
Walk across the room and notice whether any boards flex, feel spongy, split, or move underfoot. These signs can point to damage beneath the finish. Loose boards may also indicate a problem with fasteners, adhesive, or the subfloor, so the visible damage may not show the full extent of the issue.
A contractor may be able to replace a few damaged boards instead of the entire floor. If the damage is widespread, replacement may be the more practical option. Floors by the Shore notes that severe issues, including major water damage and warping, can make replacement preferable. An inspection can help determine the right scope of work.
Treat Dark Stains, Mold, and Musty Odors as Moisture Warnings
Dark stains that persist after cleaning, visible mold, or a musty odor can indicate moisture in or beneath the floor. These signs do not automatically mean the hardwood must be replaced, but they should be investigated. Moisture can discolor wood, weaken boards, and contribute to uneven surfaces over time.
Before sanding or covering the area, identify and address the source. Check nearby plumbing, windows, exterior doors, and appliances for possible water entry. District Floor Depot describes how water exposure can cause severe flooring damage, including unevenness. A flooring professional can assess the boards and recommend next steps after the moisture issue has been addressed.
Check for Subfloor Damage and Recurring Moisture
A soft, uneven, or bouncy area may signal a subfloor problem beneath the hardwood. Recurring dampness, stains, or movement can also point to a leak or moisture issue that has not been resolved. If the same signs return after repairs, ask a professional to check below the flooring.
Replacing hardwood can make it possible to inspect and repair the subfloor before installing new boards. Floors by the Shore explains that replacement provides an opportunity to address subfloor damage. The work may also involve trim or floor transitions. ValorCraft Flooring offers hardwood installation and subfloor preparation as part of its flooring services.
Fix the Moisture Source Before Installing New Flooring
New boards will not solve a leak, drainage issue, or persistent moisture problem. If the source remains, replacement flooring may warp or stain too. Have the cause identified and repaired, then allow affected areas to dry before installation. Depending on the situation, repairs may involve plumbing, drainage, or the subfloor.
Once the moisture issue is resolved, a flooring professional can determine whether the existing boards can be repaired or need replacement. Bob Vila’s hardwood flooring guide notes that flooring that cannot be refinished may need to be replaced. Before work begins, request a written estimate that identifies moisture-related repairs and explains what the project includes.
What Happens During Sanding vs. Replacement?
Sanding and replacement can both renew a hardwood floor, but they involve different work. Sanding keeps the existing boards and restores their surface. Replacement removes the old flooring so new boards can be installed. The floor’s condition, construction, and repair needs help determine which process makes sense.
Sand, Stain, and Apply a New Finish
During refinishing, a flooring crew sands off the old finish and a thin layer of wood to reduce surface scratches, scuffs, and discoloration. After sanding, the floor is cleaned and prepared for a new finish. You can choose to apply stain to change the color, followed by a protective coat. This process can restore shine and improve the appearance of worn hardwood, as Floors by the Shore explains.
Sanding can’t fix every problem. Loose boards, deep damage, or issues beneath the flooring may call for repairs before refinishing, or a different solution. Ask your contractor which repairs are included, what finish options suit your floor, and how long the room will need to dry and cure before furniture can return.
Remove Old Flooring and Install Replacement Boards
Replacement involves taking out the existing boards and installing new flooring. It can be a good option when boards are severely damaged, have already been sanded several times, or are too thin for another sanding. It also lets you choose a different wood species, board width, or style. Floors by the Shore’s comparison of refinishing and replacement outlines how removing old boards creates the opportunity to install a new floor.
If you’re replacing only part of a room, ask how the new boards will meet the existing floor. Differences in wood species, grain, stain, age, and light exposure can make a patch stand out. Your contractor can assess whether replacing a section is practical or whether a larger area will create a more consistent appearance.
Prepare the Subfloor and Repair Boards, Trim, or Stairs
Removing flooring gives the contractor a chance to inspect the subfloor before new boards go in. The subfloor may need repairs or preparation to create a stable, even base. Addressing those issues before installation can help prevent problems with the new floor. Replacement can also be a chance to discuss damaged boards, trim, transitions between rooms, or stair treads.
The specific work depends on the condition of the subfloor and how the flooring meets cabinets, doorways, and stairs. Ask for an estimate that clearly lists installation, subfloor work, and any trim or stair repairs. ValorCraft Flooring’s services include hardwood installation, subfloor preparation, trim work, and custom stair treads. Its licensed, insured, carpenter-run team uses in-house crews, so you can discuss related work directly with the professionals handling your project.
Consider How Wood, Construction, and Floor Condition Affect the Work
Not every hardwood floor can be sanded the same way. Solid and engineered boards have different construction, and the amount of wood above the tongue affects how much sanding is possible. Previous sanding also matters. A flooring professional can check the board construction and remaining wear layer before recommending refinishing or replacement.
Wood type and current condition can affect the work as well. Softer species, such as pine and fir, may need extra care, while a floor in good condition may need only light sanding and a fresh topcoat. CMC Hardwood Floors explains how wood type and floor condition can influence refinishing. Share what you know about past sanding, repairs, or moisture exposure. These details help your contractor assess the floor and clarify the work included in the estimate.
How Do Sanding and Replacement Costs Compare?
Sanding and refinishing usually costs less than replacing hardwood, but the best option depends on the floor’s condition and the work each project requires. Refinishing commonly costs about $3 to $8 per square foot. Full replacement can cost two to three times more, though prices vary by location, materials, and project scope. Treat these figures as starting points, not a quote for your home.
The main difference is what the work includes. Refinishing removes the existing finish and a thin layer of wood, then applies stain or a protective finish. Replacement involves removing the old flooring and installing new boards. Either project may also require repairs, subfloor preparation, trim work, or attention to stairs and transitions.
Square footage helps establish a budget, but it doesn’t tell the whole story. Wood type, floor condition, room layout, and access can all affect labor and materials. So can moving furniture, disposing of old flooring, or repairing damage uncovered during the work. A floor that appears to need replacement may only need refinishing, while moisture or structural problems can make a more extensive repair necessary.
When you compare estimates, check that they cover the same rooms and tasks. A lower total may exclude work another contractor has included. Ask for a written breakdown, clarify what happens if hidden damage is found, and confirm which crew will complete the project. For homeowners in North Carolina, a flooring professional can assess the boards and subfloor, then explain which costs apply to your specific floor.
Compare Each Option’s Main Cost Drivers
Refinishing costs depend on the floor’s square footage, wood type, current condition, and chosen finish. Surface scratches may need little repair, while deep stains, worn-through finish, or damaged boards can add work. Stain color and the number of finish coats may also affect the estimate. Typical refinishing cost estimates offer a helpful reference, but they can’t account for your home’s specific needs.
Replacement includes additional costs for new flooring, removal of existing boards, installation, and disposal. The wood species, material quality, and layout can affect both product and labor costs. Stairs, tight spaces, and transitions between rooms may require extra attention with either option. Ask the contractor to explain which factors affect your quote and whether the estimate includes repairs or only the main flooring work.
Budget for Sanding Labor, Finish, and Repairs
A refinishing estimate should make clear what the labor covers and whether sanding, staining, and recoating are listed separately. As a general reference, NerdWallet’s cost guide lists sanding at $0.50 to $3 per square foot, staining at $1 to $3, and recoating at $1 to $2. These are individual cost components, not necessarily the total price of a refinishing project.
Ask whether the quote includes board repairs, stain samples, finish coats, and cleanup. Damage that goes beyond normal wear may cost extra to fix. Also confirm whether the contractor plans to refinish the full connected area or only certain rooms. Different sheen or color between old and newly finished sections can be noticeable, especially in open floor plans.
Budget for Replacement Materials, Removal, Installation, and Disposal
A replacement estimate should cover more than the price of new boards. Request separate costs for flooring materials, removal of the existing floor, subfloor preparation, installation, and debris disposal. Wood species, grade, board width, and finish can all affect the materials price. Labor may vary based on the room layout and the condition of the existing floor.
Bob Vila’s hardwood flooring cost overview gives an average replacement range of about $2,500 to $6,800, though actual costs vary by home and region. The total may increase if removal reveals subfloor damage or if the project involves complex transitions. Before work begins, ask how unexpected problems will be priced and whether the contractor will get your approval before adding work.
Account for Square Footage, Subfloor Work, Trim, Stairs, and Furniture
Square footage is a useful starting point, but room shape, closets, transitions, and board layout can change the amount of labor involved. Stairs often require detailed work on treads, risers, and edges, so ask whether they’re included or quoted separately. Trim may need to be removed, replaced, or adjusted to fit the finished floor.
Subfloor preparation can add to either project, particularly if the surface is uneven or damaged by moisture. Clarify who will move furniture and protect nearby areas, and whether cleanup is part of the price. ValorCraft Flooring’s services include subfloor preparation, trim work, and custom stair treads, so homeowners can discuss those details when requesting an estimate.
Compare Itemized Estimates and Confirm What They Include
Ask each contractor for a written, itemized estimate that identifies the rooms, square footage, materials or finish, and repair work. Check whether the price includes taxes, disposal, furniture handling, trim, stairs, and subfloor preparation. If something is excluded, ask for its potential cost so you can compare the full project scope rather than just the headline total.
Before signing, find out how the contractor will handle damage discovered during removal or sanding, and whether you’ll approve extra work before it starts. Confirm who will complete the job, what preparation you’re expected to handle, and how long the rooms may be unavailable. ValorCraft Flooring is licensed and insured and uses in-house crews rather than subcontractors. To discuss your floor and request a clear estimate, contact ValorCraft Flooring.
How Long Do Refinished and New Hardwood Floors Last?
Hardwood floors can serve a home for decades, but their lifespan depends on more than the wood itself. Species, board construction, installation quality, moisture, sunlight, and everyday foot traffic all play a part. With proper care, some solid hardwood floors may last nearly 100 years or longer. Their finish usually needs attention sooner, and professional refinishing is often recommended every 10 to 15 years. Those are general estimates, not a fixed schedule: your floor’s condition and use should guide the timing. A flooring professional can assess the boards and finish to help you understand what work makes sense.
Refinishing can renew the surface of sound boards, while new flooring gives you a fresh start with new material. Neither option is a substitute for addressing moisture or structural problems first. Regular cleaning, protective pads, and quick spill cleanup can help reduce everyday wear on both old and new floors. If you’re weighing hardwood work for your North Carolina home, ValorCraft Flooring’s services include hardwood installation and refinishing, along with subfloor preparation and trim work. Use the guidance below to understand what affects floor life and how to care for your investment.
Understand What Affects Refinished Floor Lifespan
Refinishing removes the old finish and a thin layer of wood, then adds a new protective surface. When the boards are sound and have enough material remaining, this can restore their appearance and extend their useful life. Some hardwood floors may last nearly 100 years or longer with proper care, while refinishing is often needed every 10 to 15 years. Treat that interval as a general guide rather than a deadline. The condition of the floor and how it’s used help determine when refinishing is appropriate.
Each sanding removes some wood, so a floor’s thickness and sanding history affect how many times it can be refinished. Ask a professional to check those factors before work begins. Refinishing can address surface wear, but it won’t stabilize loose boards or repair serious moisture damage.
See How Wood, Workmanship, and Conditions Affect New Floors
New hardwood can last for decades, but the outcome depends on the material, installation, and conditions in the home. Wood species and board construction affect how a floor responds to daily use. Softer woods may dent more easily, while some oily exotic woods can require extra care during sanding. Understanding how wood type affects flooring work can help you compare options and plan for maintenance.
Installation quality matters, too. A stable, properly prepared subfloor and careful fitting help reduce movement and premature wear. Indoor humidity, sunlight, pets, and foot traffic also shape how a floor ages. Before choosing a product, ask your installer which finish and care routine suit your rooms. ValorCraft’s carpenter-run team can discuss material and installation considerations for your project.
Extend Floor Life With Routine Cleaning and Protective Pads
Regular cleaning helps keep grit from scratching the finish. Sweep or vacuum with a hardwood-safe attachment, then use a cleaner recommended for your floor’s finish. Avoid soaking the boards or using abrasive tools. Promptly removing dirt and debris can reduce surface wear, while timely professional sanding may address worn areas before damage becomes more extensive. Routine sanding and maintenance can help preserve the floor over time.
Felt pads under chairs, tables, and other furniture can help prevent scratches. Check the pads occasionally, since trapped grit or worn felt can still mark the finish. Lift furniture when moving it rather than dragging it across the boards. You can also trim pets’ nails and place a mat at exterior doors to catch dirt. These habits won’t prevent every scuff, but they can limit avoidable wear between refinishing projects.
Control Indoor Moisture and Wipe Up Spills Promptly
Wood responds to changes in moisture, so keeping indoor conditions within the flooring manufacturer’s recommendations can help limit movement and gaps. Pay attention during seasonal shifts, especially if indoor humidity changes significantly. If boards cup, separate, or change shape, look for a leak or another source of excess moisture before considering sanding. Surface work won’t resolve an ongoing moisture problem, and repairs may not last until the source is fixed.
Wipe spills promptly and avoid leaving wet shoes or damp mats on the floor. Check around sinks, appliances, and exterior doors where water can go unnoticed. Sunlight and everyday use can also change a floor’s appearance over time. Dark spots, uneven fading, or worn finish may be signs that the boards need a closer look. If you see persistent discoloration or changes in the wood, ask a flooring professional to assess the cause.
Use Rugs and Manage Foot Traffic in High-Wear Areas
Entryways, hallways, and paths between busy rooms often show wear first. Place rugs or runners in these areas to catch dirt and reduce abrasion from daily foot traffic. Choose a rug backing that’s safe for hardwood, since some materials can affect the finish. Clean beneath rugs periodically so grit doesn’t collect and scratch the boards.
Rugs can also protect floors in dining areas or beneath furniture. Keep them dry, and move them occasionally to reduce noticeable color differences caused by sunlight exposure. In a busy household, pay attention to where people and pets walk most, then add protection where it’s useful. These steps won’t eliminate maintenance, but they can help the finish wear more evenly. Long-term care also matters when weighing refinishing against replacement, especially if you’re considering the floor’s value and future needs.
How Do Appearance and Disruption Affect Your Choice?
Refresh Existing Wood With a New Stain or Finish
If your hardwood is structurally sound but looks dull, scratched, or worn, sanding and refinishing may restore its appearance without replacing the boards. The process removes the old finish and a thin layer of wood, then applies a new stain, protective finish, or both. Depending on the floor’s condition, you may be able to keep its current color or choose a different one.
Refinishing works best when the damage is mostly at the surface and the boards have enough usable wood for sanding. Deep stains or a history of repeated sanding can limit the results. A flooring professional can inspect the floor and explain what’s realistic before work begins. Explore ValorCraft’s hardwood sanding and refinishing services to learn about the work involved.
Preserve Original Grain—or Consider How Replacement Boards May Differ
Sanding and refinishing lets you keep the original boards, including their grain patterns, natural variations, and character. You can choose a new stain or finish, but the final color may vary from board to board because wood absorbs stain differently. Ask your contractor about sample areas if you’re considering a significant color change.
Replacement gives you more choice in wood species, board widths, and finishes, but new boards may not match the existing floor exactly. Grain, color, and texture can differ, especially when replacing only part of a room. A full refinish also offers more color flexibility than a surface recoat, as Weles explains in its comparison of refinishing and recoating.
Plan for Sanding Dust, Odor, Drying, and Curing
Sanding creates dust, and stains or finishes may produce odors during application and drying. Professional equipment and careful work-area preparation can help manage dust, but it’s still worth asking how the crew will protect nearby rooms and surfaces. Find out which rooms need to be cleared and whether you should adjust ventilation or make other preparations.
You’ll also need to keep people and pets off the floor while the finish dries and cures. The wait depends on the products used and conditions in your home, so ask your contractor for a schedule before work starts. Professional hardwood sanding can restore a floor’s appearance, but planning for the work area and curing time helps you prepare your household.
Expect Demolition Noise, Installation Work, and Limited Room Access
Replacing hardwood involves removing the existing flooring, preparing the subfloor, and installing new boards. Expect noise, dust, material deliveries, and limited access to the rooms being renovated. The space may remain out of use while installation and any necessary finishing work are completed.
Sanding and refinishing also requires clearing the work area and staying off the floor during drying and curing. However, if the existing boards are suitable, this option avoids demolition and installation. Consider how much disruption your household or business can accommodate, and ask for a schedule that explains the work sequence and when each room will be ready. Replacing a floor often takes longer because the old flooring must be removed before the new material is installed.
Weigh Project Size, Repairs, and Household Needs
A small room with surface wear may be a straightforward sanding project. Larger areas, damaged boards, stairs, trim, or subfloor repairs can add work to either option. Replacement may make more sense when damage is widespread, while sanding may be suitable when the boards are sound and have enough usable wood for refinishing.
Think about how the work will affect your household or building. Can you move furniture and keep children and pets away from the work area? For rental properties or commercial spaces, consider tenants, customers, and operating hours. A professional assessment of the floor’s condition can help clarify the scope. Request a written estimate that lists repairs, materials, and expected room-access limits.
How Should You Choose Between Sanding and Replacement?
Start with the floor’s condition, then weigh your budget, schedule, and preferred look. Sanding can refresh sound hardwood with surface wear, while damaged boards or subfloor problems may call for repairs or replacement. A professional assessment can help you understand which option suits your floor and what the work will involve.
Match Surface Wear to Sanding and Structural Damage to Repair or Replacement
Sanding may be a good fit when the boards are stable and the main issue is a worn surface. Scratches, shallow dents, fading, and a tired finish can often be addressed by removing the old finish and applying a new one. A Step Above Floors explains common signs that may help you tell surface wear from more extensive damage.
Loose, split, or buckled boards need a closer inspection. A contractor may be able to repair a few damaged boards, while widespread damage could make replacement more practical. If moisture is involved, identify and correct its source before refinishing or installing new flooring. Otherwise, the problem may affect the floor again.
Remember: Not Every Floor Can Be Sanded—or Needs Replacement
A worn appearance does not automatically mean you need a new floor. If the boards are in good condition, sanding may refresh their color and finish while preserving the existing wood. But not every hardwood floor can be sanded. Solid hardwood’s refinishing potential depends on its thickness and how much wood previous sanding removed.
Engineered hardwood has a real-wood wear layer over a layered core. That top layer may limit how much sanding it can handle. The District Floor Depot guide notes that many quality hardwood floors can be refinished multiple times, but the right answer depends on the individual floor. Ask a flooring professional to assess the boards and wear layer before sanding begins.
Compare Cost, Maintenance, Lifespan, and Desired Appearance
Refinishing is often less expensive than replacement when the existing boards and subfloor are sound. Replacement typically involves additional costs for new materials, removing the old floor, installation, and disposal. Repairs, trim, stairs, room layout, and wood type can also affect the estimate. Hardwood refinishing cost factors vary by project, so use published price ranges as a guide rather than a quote.
Appearance matters, too. Sanding can refresh the existing wood and may allow you to choose a different stain or finish. Replacement offers new material options, though new boards may not match nearby floors exactly. Compare care needs and expected lifespan alongside the initial price. A flooring contractor can review available flooring services and help you weigh options for your home.
Consider Your Timeline, Household Disruption, and Plans for the Home
Sanding keeps the existing boards in place, but you’ll need to clear the room and stay off the floor while the finish dries and cures. Ask how long the process takes, when it’s safe to walk on the floor, and when you can move furniture back. Make a plan for children and pets to stay away from the work area.
Replacement involves removing the old flooring before installing new boards, which can add time and increase activity in the home. Floors by the Shore explains why replacement often takes longer than refinishing. The project size, needed repairs, and access to each room can affect the schedule. Tell your contractor about upcoming moves, renovations, or other timing needs before work begins.
Ask a Flooring Professional to Assess the Boards, Wear Layer, and Subfloor
An on-site assessment can help identify whether the problem is limited to the finish or extends to the boards or subfloor. Ask the contractor to check for loose boards, deep stains, gaps, signs of moisture, and uneven areas. For solid hardwood, they can assess how much wood remains for sanding. For engineered hardwood, ask whether the wear layer is thick enough to refinish.
Share any history you know, such as previous sanding, leaks, or repairs. Those details help the contractor evaluate the floor beyond what’s visible. ValorCraft Flooring’s licensed, in-house team can assess hardwood flooring and discuss refinishing, repairs, or replacement options. Ask for a clear explanation of the recommended work and why it fits your floor’s condition.
Request a Clear Written Scope From a Licensed and Insured Contractor
Before approving the project, request a written estimate that describes the work room by room. For sanding, confirm the areas included, stain and finish choices, board repairs, and preparation. For replacement, ask whether the estimate covers materials, removal, disposal, subfloor work, transitions, and trim. It should also identify exclusions and explain what could change the price.
A detailed scope makes estimates easier to compare and helps set expectations for the schedule and finished result. Confirm who will complete the work and how the contractor will handle any damage discovered along the way. ValorCraft Flooring is licensed and insured, uses professional in-house crews, and provides clear estimates. Contact the team to discuss your hardwood floor and request an assessment.
Frequently Asked Questions
Can I refinish hardwood floors without sanding them?
Sometimes. If the boards are in good shape and the finish is only dull or lightly scuffed, a screen-and-recoat may be enough. It won’t remove deep scratches or stains, so have the floor inspected before choosing this option.
How can I tell whether my hardwood floor has been sanded too many times?
The remaining wood above the tongue and groove determines whether another sanding is safe. A flooring professional can inspect the boards and consider their construction and refinishing history. Product details may also help, especially for engineered hardwood.
Will refinishing remove dark stains from hardwood?
It may lighten some surface stains, but discoloration that has penetrated the wood can remain after sanding. Moisture-related stains should be checked for an ongoing leak or dampness before the floor is refinished.
Is it possible to replace only a few damaged boards?
Yes, if the damage is limited and the surrounding floor is stable. New boards may differ in color, grain, or texture, so ask how the repair will look and whether the surrounding area may need refinishing.
What should a hardwood flooring estimate include?
Ask for a written scope that identifies the rooms, preparation, repairs, materials or finish, and any subfloor, trim, stair, or disposal work. Clarify what is excluded and how additional work will be approved and priced.