
Herringbone flooring gives a room a repeated zigzag that can make the floor a central design feature. Rectangular pieces meet at right angles, with the end of one piece connecting to the side of the next. That pattern looks orderly when viewed across a room, but the finished result depends on several decisions made before installation: whether the exact product supports the arrangement, where the layout begins, how it meets openings, and what preparation the substrate needs. If you are considering herringbone flooring, use this guide to plan those decisions in sequence rather than choosing from a photograph alone.
Request a free flooring estimate
What does a herringbone floor look like up close?
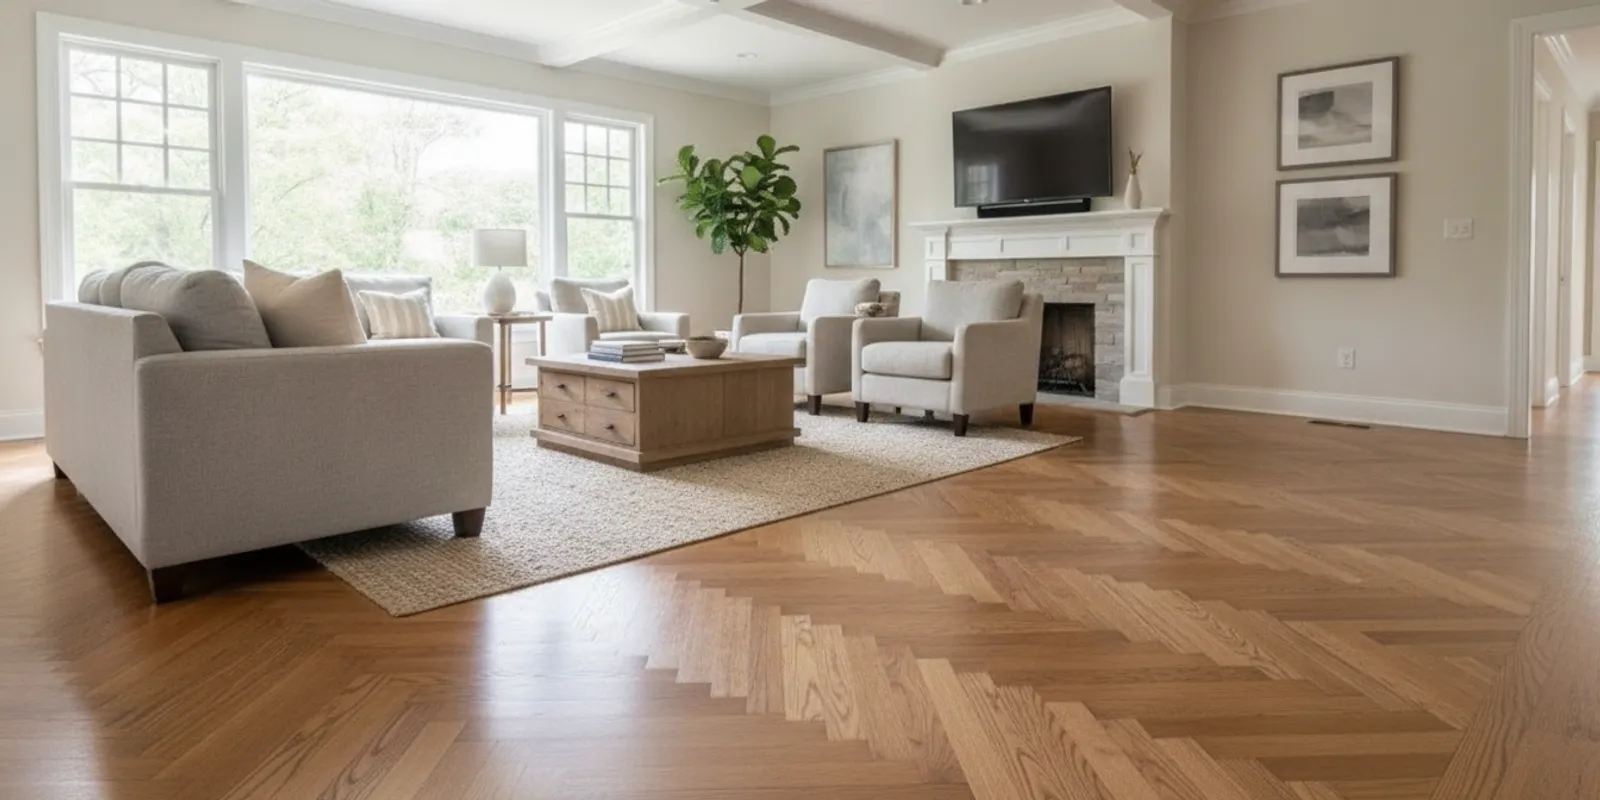
Herringbone is a layout pattern, not a particular flooring material. Each rectangular unit is placed perpendicular to the piece beside it. The pattern repeats as a series of interlocking L shapes, producing a broken zigzag across the floor. From a distance, the eye may read the repeated points as diagonal movement. At closer range, the individual joints and plank edges become part of the visual texture.
That geometry distinguishes herringbone from chevron. In a chevron layout, the ends of the pieces are cut at an angle so they meet in a continuous V. In herringbone, the units typically retain square ends and one piece meets the side of another. A photo can make the two patterns seem similar, especially when viewed at a distance, so look at a close-up and confirm the actual product and layout being proposed.
Herringbone changes the character of a space because it introduces more directions and intersections than parallel rows. The result can make an entry, dining space, or living area feel deliberately composed. It also draws attention to alignment. If the pattern is intended to lead toward a doorway or along an open-plan sightline, the direction should be discussed before the starting point is set. There is no universal direction that works in every floor plan.
Pattern scale makes a noticeable difference. Short, narrow pieces create frequent joints and a tighter rhythm. Longer or wider pieces produce a larger-scale arrangement. Color variation, grain, edge definition, and finish also influence how strongly the pattern reads. A high-contrast product makes each turn easier to see; a quieter color and grain can make the geometry more subtle. Compare samples in the room's light, but remember that a small board cannot show how a repeated pattern will look across the full area.
How is herringbone different from a straight layout?
In a conventional straight layout, planks run in parallel rows. The installer still has to plan the starting course, stagger joints where required, and handle boundaries, but the repeated lines are relatively simple to follow. Herringbone adds another relationship to preserve: each piece must meet its neighbor at the intended angle and position. The reference line and the early courses guide the pattern that follows.
This does not mean that every herringbone project is automatically more difficult in the same way. A square, open room with few interruptions presents different layout questions from a narrow space with several doors, built-ins, or changes in width. The selected flooring system matters too. What matters is that the installer identifies the actual product requirements and evaluates the room before committing to the arrangement.
Think of the pattern as a visual grid that has to relate to the room's fixed features. The walls may not be square to one another. A doorway may be offset from the center. A kitchen island may create a prominent edge, while a fireplace or cabinet run may become the natural reference for the eye. If the layout is started from a wall without checking those relationships, the pattern can appear to drift or end in narrow pieces at a visible boundary.
Herringbone also creates more cut edges around the perimeter and at interruptions. Those edges are not necessarily a problem; they are a normal part of fitting a pattern to a real room. The point is to plan where they will occur and how they will be finished. A carefully considered perimeter may balance cut sizes and avoid a tiny fragment in a prominent location. The particular plan depends on the product, room dimensions, and desired finish detail.
Which materials can be installed in this pattern?
Material choice and pattern choice should be evaluated together. Hardwood products may be specified for patterned installation, but solid and engineered products differ in construction and installation considerations. The selected pieces, substrate, and approved installation method all matter. Review hardwood flooring options with those requirements in mind, not just the color and grain.
Some luxury vinyl plank and laminate products may also be suitable for a herringbone arrangement. Their dimensions, locking profiles, adhesive requirements, and manufacturer-approved layouts vary. A standard plank designed for a particular floating installation cannot be assumed to work in a different pattern just because it resembles wood. Ask whether the exact product line and format are approved for the layout and what components or installation method are required.
ValorCraft's LVP installation information and laminate flooring information are useful starting points for discussing those categories. A service-page description or a display photo is not a substitute for the selected product's instructions. If the proposal identifies a product later, make sure the pattern and installation system are confirmed for that exact selection before ordering.
Use a short product-check process:
- Record the exact product. Note the manufacturer, product line, color, dimensions, edge profile, and any accessories or underlayment specified. Similar-looking products can have different installation systems.
- Find the pattern instruction. Ask whether the manufacturer permits herringbone and whether the product is sold in a format intended for that layout. Do not infer approval from a photograph or a general statement about the material category.
- Match the method to the substrate. The permitted method may depend on whether the base is a wood subfloor or concrete, and on the condition of the existing surface. Follow the product instructions and project assessment.
- Confirm the details in writing. The proposal should identify the chosen material and the anticipated installation approach, or clearly state what remains undecided.
For hardwood, ask whether the choice is solid or engineered and what site conditions guide the installation approach. Do not assume every wood floor can be installed directly over every slab or substrate. For vinyl or laminate, ask about the specific locking or bonding system rather than treating all planks as interchangeable. Across all materials, maintenance instructions and repair options should be part of the selection conversation.
How should you choose the pattern direction?
Begin with how the room is seen and used. Stand at the main entrance and look toward the most prominent feature or connected space. Then consider the view from the opposite direction and from the adjoining room. A pattern that looks balanced from one position may feel less intentional when seen from the main circulation path. The goal is not to make every viewpoint identical; it is to identify the sightline that matters most and plan around the whole room.
In a simple rectangular room, homeowners often compare a layout aligned with the room's long direction with one that responds to an entry or focal feature. Those are planning options, not fixed rules. In an open plan, the main axis may run through multiple spaces, and a pattern that seems centered in one zone may land awkwardly in another. Decide whether the flooring should read as one continuous field or as distinct areas joined at planned transitions.
Before installation, the installer should establish a reference and test how the pattern lands at the boundaries. A wall can look straight but still be out of square with another wall. Measuring from one edge and following it across the entire room can therefore leave the pattern visually misaligned in a more prominent place. The layout should be considered against actual dimensions and site conditions rather than relying on an assumed square corner.
Walk through these planning questions together:
- What is the primary view? Identify the entrance, long sightline, or focal feature that should guide the pattern.
- What should the pattern relate to? Consider the room's dimensions, a doorway, a fireplace, or a fixed cabinet run. Ask which feature is the best reference and why.
- Where will the first visible cuts appear? Examine the most noticeable walls and openings, not only corners hidden by furniture.
- What happens at the center? Consider whether the arrangement should appear balanced around a central axis or align with a feature that is not at the room's midpoint.
- How will the pattern meet the next room? Decide where it continues and where it stops before material is installed.
A useful planning discussion may include a simple measured sketch. Mark door openings, closets, alcoves, cabinetry, fireplace edges, and any change in floor height. Add the desired direction and the primary viewing point. The sketch is not a replacement for on-site measurements, but it helps identify questions that need answers and gives everyone a shared reference.
Consider a rectangular living room that opens into a hallway. If the pattern is centered only within the living room, it may reach the hallway at an unexpected angle or with an unbalanced cut. If the hallway direction is more important, the reference may need to account for both spaces. A planned transition can separate the fields, but the location and finish still need to be defined. The right answer depends on which areas are in scope and how the rooms connect.
How do room shape and fixed features affect the layout?
Real rooms rarely behave like empty rectangles. Bay windows, closets, alcoves, islands, hearths, built-in shelving, and changes in room width interrupt the field. Each interruption affects the way the pattern approaches an edge and the size or shape of the pieces that must be fitted. During planning, identify the features that stay in place and those that may be removed or moved as part of the project.
Start with an accurate room outline. Include wall offsets and openings instead of simplifying the drawing into one length and one width. For an open-plan area, document each connected zone and the passage between them. The purpose is not to calculate every cut yourself; it is to avoid leaving a key boundary out of the discussion. An estimator or installer can then assess the conditions and describe how the layout is to be carried through.
Next, rank boundaries by visibility. A cut beneath a fixed cabinet toe-kick may be less visually prominent than a cut at the entry. A short piece near a threshold may be unavoidable, but its location may be changed by adjusting the starting point or the pattern's reference. Do not assume every edge can have full pieces. Instead, ask how the plan balances the visible perimeter and what trim or transition will conceal or finish each edge.
Fixed cabinetry raises practical questions beyond geometry. Determine whether the floor will run to the cabinet edge, whether cabinetry is being installed later, and what the product instructions require. The sequence can affect how the floor terminates and whether future changes are practical. Similar care applies around fireplaces and built-ins. The flooring scope should describe the edge treatment and identify any work that belongs to another trade.
Doorways deserve special attention because they connect sightlines and materials. If the same pattern continues through multiple openings, the layout must be considered across those openings rather than as a series of unrelated rooms. If it stops, a clearly located termination and suitable transition may make the boundary feel intentional. Discuss door swing and the height relationship between surfaces. A decorative strip alone does not resolve every difference in floor assembly or elevation.
Should the pattern continue from room to room?
Continuity can make connected rooms read as one floor, but it also increases the number of relationships that need to align. A hallway, kitchen, and living room may have different proportions, door locations, and fixed obstacles. Extending one pattern through all of them can be visually cohesive when the geometry supports it. It can also produce awkward cuts or competing alignments if the plan is made one opening at a time.
Stopping at a doorway creates a deliberate boundary. This can be useful when another material begins, when the rooms are visually distinct, or when a change in direction would be difficult to resolve. The stopping point should be chosen before installation, with the edge and transition specified. Review floor transition options as part of the plan, but do not select a strip without checking the actual height and product requirements.
Compare the alternatives by drawing the rooms as connected spaces. For a continuous layout, trace the main reference through each opening and inspect how the pattern reaches walls and cabinets. For separate fields, mark each termination and show the transition location. Ask whether the visual break is where people naturally expect one and whether doors will operate as intended. This small exercise can reveal a decision that is easy to miss when discussing each room separately.
The written scope should name the spaces receiving the pattern and state where it continues or ends. If the project includes only one room now but may extend into an adjoining area later, tell the estimator. A future continuation may influence where a transition is located or how material is retained, though the best arrangement depends on the selected product and the future scope. Do not assume a later extension will align automatically with a floor installed today.
What makes the installation plan precise?
The layout plan translates the desired appearance into a repeatable on-site reference. It should establish the direction, the starting area, and how the pattern will be evaluated against room boundaries. For herringbone, the first pieces matter because subsequent pieces repeat their orientation and spacing. If the reference is inaccurate or an early course shifts, the visual effect can become more apparent as the floor expands across the room.
Before permanent installation, discuss how the layout will be checked. The installer may assess the room's dimensions, set reference lines, and test the pattern's relationship to the walls and openings. The specific method depends on the material and site; the homeowner does not need to prescribe a technical procedure. The useful question is what feature guides the layout and how the installer will confirm the result before proceeding.
Room boundaries may not be parallel, so the pattern's center and perimeter need separate attention. A visually balanced center does not guarantee that the cuts at every wall will be equal. Conversely, equal-looking cuts at the edges may not align the pattern with the focal point. Planning is a series of trade-offs. The installer should explain the chosen reference and any visible compromise before work begins.
For a room with an island, for example, the island may dominate the view even if it is not at the room's center. A pattern centered on the overall floor area could look off relative to that fixed feature. A different reference may make the island relationship feel more deliberate but change the perimeter cuts elsewhere. This is why a room plan and a conversation about priorities are more useful than a rule that says every herringbone floor must begin at the center.
For a narrow entry, the pattern's direction can change the way the space is perceived. A layout aimed toward the adjoining room may create a sense of connection, while a different direction may emphasize the entry itself. The result also depends on piece size and the amount of floor visible. Look at a sample installation, if available, but confirm that the example uses the same product proportions and pattern.
How much material should be allowed for?
A herringbone layout generally requires more perimeter cuts than parallel rows. The pattern reaches walls and openings at different angles, and some offcuts may not fit elsewhere in the field. That can affect the amount of material to order. There is no single reliable waste allowance for every project: room shape, piece dimensions, layout direction, number of doorways, borders, and product packaging all influence the quantity.
Ask the estimator to distinguish measured floor area from the order quantity. The measured area describes the surfaces in scope; the order quantity also reflects the product's package size and the plan for cuts and suitable offcuts. If the room includes closets, alcoves, or connected areas, confirm what has been counted. These details help explain the material allowance without relying on a generic percentage that may not fit the project.
Offcuts are not all interchangeable. A usable piece must fit the pattern, meet product requirements, and be in suitable condition. A piece cut for one boundary may be too short or oriented incorrectly for another. The shape of the room and the sequence of work affect whether cut material can be reused. That is why a patterned floor may require a different allowance from a straight-laid floor of the same measured area.
Material quantity is also affected by design choices made after the initial estimate. Adding a border, extending the pattern into a closet, changing piece dimensions, or shifting the starting reference can change the cutting plan. If a product selection changes from a pattern-ready format to a standard format, the installation method and quantity assumptions may need review as well. Confirm revisions before the order is finalized.
Ask whether retaining a small amount from the same production run is practical for a future repair. Color and finish can vary between production batches, and the ability to store spare material depends on the manufacturer's instructions and available space. Keeping extra product is not a substitute for careful installation, but it can be useful to discuss while the quantity is being determined.
A clear estimate should avoid both extremes: ordering an arbitrary large amount without explanation and assuming a minimal quantity will cover every cut. Ask how the allowance relates to this room's layout, product dimensions, packaging, and visible boundaries. If the plan changes, ask whether the revised quantity or product mix changes too.
Why is subfloor preparation important?
The substrate supports the finished floor, and its condition must suit the selected product and installation system. Herringbone makes alignment more visible because the pattern repeats in multiple directions. If the base is inconsistent or the product is installed over conditions it does not permit, the result may not perform as intended. Patterned layout does not replace the need to evaluate the substrate; it makes that evaluation part of sound planning.
The appropriate checks depend on what is under the existing floor and what product is selected. A wood subfloor, concrete slab, and existing floor covering raise different questions. The installer may assess visible damage, fastening, surface condition, flatness, and moisture-related requirements. Testing and preparation methods should follow the flooring manufacturer's instructions and project conditions, not a universal assumption applied to every home.
Preparation may involve fastening, patching, leveling, removal, or other work when conditions call for it. Those tasks are not automatically included in every installation proposal. The written estimate should explain what has been observed, what work is included, and how concealed conditions will be handled if they appear after an existing floor is removed. If a concern requires specialist assessment or structural work, it should be identified rather than treated as routine leveling without explanation.
ValorCraft describes subfloor preparation services as part of flooring work. Ask which preparation steps are anticipated for your room and what remains uncertain until the substrate is exposed. Flatness limits, moisture limits, adhesive selection, and any acclimation requirements vary by product and project. The selected manufacturer's instructions and the actual site assessment govern the applicable details.
Moisture is a planning issue, not a one-size-fits-all number. The relevant test, acceptable result, and response depend on the selected flooring system, substrate, and installation method. Ask what specifications will be used and whether testing or mitigation is part of the quoted scope. Do not assume that a product category has one universal moisture threshold or that an adhesive can solve every substrate condition.
If existing flooring or adhesive may contain asbestos, do not disturb it until qualified assessment and clearance establish the proper next steps. This is especially important when considering removal or preparation work in older spaces. A flooring estimate should not be read as authorization to scrape, grind, or otherwise disturb a suspect material. Make the concern known before work is planned.
Which details should be settled at transitions and edges?
The pattern's ending is part of its design. Identify how it meets another flooring material, an exterior door, a stair, a cabinet edge, or an opening to a room outside the project. Each location may involve a different finish detail. The chosen transition should suit the products and actual height relationship, and it should not interfere with door operation or create an unclear edge.
Discuss baseboards and trim early. Existing baseboards might remain, be removed and reinstalled, or be replaced; shoe or quarter-round trim may be considered depending on the project. These tasks are not automatically part of every installation. The proposal should say what will happen at the perimeter and whether painting or other finish work is excluded. A beautifully aligned field still needs an intentional edge.
Stairs introduce additional decisions. The herringbone field may approach a landing or stair edge, where the product and finish method need to be coordinated with the stair assembly. Stair work can involve separate materials and scope. Do not assume that a floor installation includes stair treads, nosings, risers, or structural changes. Ask how the project ends at that location and who is responsible for any work outside the flooring scope.
At an exterior door, consider how the finished floor meets the threshold and whether the door clears the completed surface. At an interior door, check where the transition will sit relative to the closed door. For a change from one material to another, consider both the visual boundary and the physical connection. These are site-specific details, so a photo or generic transition chart cannot confirm the correct assembly.
How can you compare herringbone with a simpler layout?
Herringbone is a good fit when the pattern itself is part of the desired design and the exact product supports it. A straight layout may be preferable when a quieter surface better suits the room, when the product is designed for parallel rows, or when the plan would otherwise require difficult transitions. Neither option is universally better. Compare the visual effect, product suitability, room geometry, and scope rather than judging by a trend or a single sample.
Use this comparison to organize the conversation. It describes planning considerations, not a promise that every project will follow the same steps.
| Planning question | Herringbone layout | Straight layout |
|---|---|---|
| Visual character | Repeated interlocking angles create a more directional, patterned surface. | Parallel rows create a simpler, more linear field. |
| Product check | Confirm the exact product format and installation method are approved for the pattern. | Confirm the product's standard layout and installation instructions. |
| Reference planning | Discuss the pattern axis, main sightline, starting area, and boundaries together. | Plan the direction of the rows, starting course, and perimeter cuts. |
| Cut planning | More angled perimeter conditions may affect offcuts and quantity. | Perimeter cuts still matter, but the row geometry is different. |
| Open-plan decisions | Plan continuity and pattern alignment across openings before installation. | Plan row direction and transitions across connected rooms. |
| Estimate review | Clarify product suitability, layout, cut allowance, preparation, and edge details. | Clarify product, row direction, preparation, removal, and edge details. |
When comparing proposals, make sure they cover the same rooms and the same finish work. One estimate may include removal or trim, while another may assume those tasks are separate. One may describe a particular pattern and transition; another may quote a basic installation only. Ask each provider to state preparation assumptions, product selection, and any conditional work so the comparison is meaningful.
What should a written estimate explain?
A useful estimate connects the design idea to the actual floor and project scope. It should identify the areas included, the selected product when known, and the expected installation method. For herringbone, ask that the plan describe the intended direction or reference, how it approaches significant boundaries, and where the pattern stops or continues. The written estimate controls what is included.
Review these items before approving:
- Rooms and measured areas: Confirm every room, closet, or connected area included and identify exclusions.
- Product and format: Record the material, product line if selected, dimensions, and whether the exact format supports herringbone.
- Layout intention: Note the primary sightline or reference, the starting area, and the expected pattern termination at openings.
- Removal and disposal: State whether existing flooring removal and haul-off are included or separate.
- Subfloor evaluation: Identify the preparation included and how additional work will be discussed if hidden conditions differ.
- Moisture and other tests: Clarify whether any testing or mitigation is anticipated and which product or project specifications govern it.
- Transitions and trim: Identify transition locations, baseboard or shoe molding treatment, and any stair or edge work.
- Furniture and appliances: Confirm whether moving items is included; do not assume it is.
- Material allowance: Ask how the order quantity accounts for the layout, room shape, product packaging, and possible retained material.
- Finish and use instructions: Ask what product-specific maintenance, adhesive cure, or return-to-use instructions apply.
Ask for clarification when a detail could change the appearance, scope, or sequence. A free estimate is a consultation and quote, not free installation, a fixed price for unknown conditions, or a guaranteed turnaround. If measurements, product selections, or substrate conditions change, request an updated explanation before proceeding.
It can help to separate known work from contingencies. For example, the proposal may identify the visible floor area and product choice while noting that subfloor repair cannot be determined until existing flooring is removed. The homeowner should understand what is included now, what might be added, and how approval will be handled if a new condition is found. Clear scope reduces misunderstandings without pretending that concealed conditions are already known.
What is a practical planning sequence?
Following a sequence keeps design choices connected to installation requirements. It also helps homeowners avoid spending time choosing a pattern for a product that cannot be installed that way or selecting transitions before the floor assembly is understood.
- Define the rooms. List the spaces included and mark doorways, closets, fixed cabinets, stairs, fireplaces, and other interruptions. Note any areas that may be added later.
- Choose the visual priority. Identify the most important sightline or feature. Decide whether the floor should connect adjoining rooms or stop at a planned boundary.
- Shortlist suitable products. Compare appearance and practical care, then check manufacturer information for pattern compatibility and installation requirements.
- Assess the site. Have the room and substrate evaluated. Discuss existing floor removal, surface condition, moisture-related requirements, and any uncertainty that needs investigation.
- Test the layout concept. Review the proposed direction and how it lands at visible edges, openings, and fixed features. Ask what reference will guide the pattern.
- Resolve transitions and scope. Specify where the pattern ends, how edges and trim are treated, and which preparation, removal, and moving tasks are included.
- Review material quantity. Understand the measured area, order quantity, packaging, and allowance for cuts. Revisit this if the layout or product changes.
- Approve the written plan. Make sure the estimate describes the agreed spaces, product, preparation assumptions, transitions, and conditional work before the order or installation proceeds.
This sequence is useful whether the project is one room or a connected floor. For a small entry, product fit and the visible termination may be the main questions. For a larger open plan, alignment across rooms, cabinet edges, and multiple thresholds may deserve more discussion. The process stays the same; the number of decisions changes with the site.
How should different homeowners approach the decision?
A homeowner updating a single entry may prioritize the first impression and a clean edge at the next room. In that case, discuss whether the piece scale suits the small footprint and what the pattern looks like when viewed from the front door. Ask how the final cut meets the threshold and whether the chosen material is appropriate for the conditions of that space. A dramatic pattern can be compelling, but sample size and room scale should be considered together.
In a family living area connected to a kitchen, continuity may be the central question. Draw the whole connected area, then mark the island, cabinets, passage to the hall, and any change in floor material. Decide whether the pattern should flow through those openings or terminate at one or more planned thresholds. Product suitability and the surface beneath the existing floor may affect the decision, so make the design discussion part of the site assessment.
For a homeowner furnishing a room around a fireplace or built-in, identify whether the fixed feature should guide the layout. Centering on the room dimensions and aligning visually with the fireplace can produce different outcomes. Ask to see how each choice affects the perimeter cuts and adjacent doorway. The objective is not to force symmetry where the room is asymmetrical, but to make a deliberate choice about the feature that matters most.
For a project that may be phased, decide what is being installed now and what is only a future possibility. If a hallway or adjoining room may be added later, explain that during planning. A transition or pattern termination can be considered with the future phase in mind, but future alignment is not automatic. The product may change, and the visible conditions may differ. Keep the current scope clear while asking what should be documented for later reference.
What questions should you ask before installation?
Bring product details and a simple room sketch to the estimate conversation. Include photographs of thresholds and fixed features if they help explain the room, while recognizing that an on-site assessment is needed to confirm conditions. Rather than asking only whether a pattern is possible, ask what has to be true for this particular product and room to support it.
- Is this exact product and format approved for herringbone, and where are its instructions?
- Which installation system is proposed for the substrate and site conditions?
- What room feature or reference will guide the pattern direction?
- How will the installer review the layout at the openings and most visible boundaries?
- Will the pattern continue through adjoining rooms or stop at a defined transition?
- What substrate conditions have been observed, and what remains unknown before removal?
- Does the scope include removal, disposal, leveling, moisture mitigation, trim, or furniture moves?
- How was the material quantity determined for the product and layout?
- What maintenance, cure, or use guidance applies to the selected product and method?
- How will any additional work be explained and approved if site conditions differ?
These questions help you compare a staged inspiration image with the actual project. They also make it easier to identify what is a design preference, what is a product requirement, and what depends on the room's condition. If an answer changes the agreed look or scope, ask to have the revision recorded.
Explore hardwood flooring installation
Plan the pattern before choosing the final detail
Herringbone flooring can give a room a strong visual direction, but a considered result starts with more than selecting a color. Confirm that the exact product supports the layout, identify the room's main sightline, plan boundaries and transitions, and assess the substrate against product requirements. Then make sure the written estimate describes the rooms, preparation assumptions, material allowance, and finish details. With those decisions clear, you can judge whether herringbone fits your space and understand what its installation requires.